The holiday season is the most wonderful time of year, but it can also be the busiest! Between decorating the tree, wrapping gifts, attending parties, and hosting family gatherings, finding time to prepare elaborate desserts can feel impossible. That’s where these incredible 10-minute Christmas desserts come to your rescue!
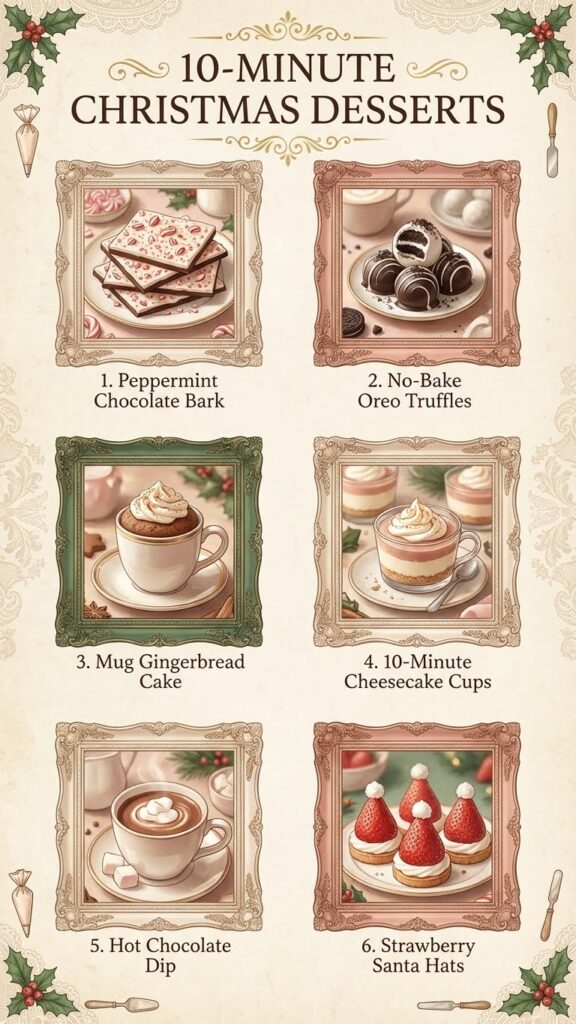
Each of these six festive treats delivers stunning presentation and delicious flavor without keeping you chained to the kitchen. Whether you’re an experienced baker or a complete beginner, these foolproof recipes will make you look like a holiday baking superstar with minimal effort.
Perfect for last-minute gatherings, unexpected visitors, cookie exchanges, or simply satisfying your sweet tooth after a busy day of holiday preparations, these desserts prove that impressive doesn’t have to mean time-consuming.
1. Peppermint Chocolate Bark
A Classic Holiday Favorite
There’s something magical about the combination of rich chocolate and cool peppermint that screams Christmas! This elegant chocolate bark looks like it came from an expensive boutique chocolatier, but it takes just minutes to prepare and uses only a handful of simple ingredients.
Why You’ll Love It:
- Requires only 2-3 ingredients
- Perfect for gift-giving
- Impressive presentation
- Kid-friendly to make
- Can be customized endlessly
Ingredients:
- 1 cup dark chocolate chips (or milk chocolate if preferred)
- ¼ cup crushed candy canes or peppermint candies
- Optional: ½ cup white chocolate chips for drizzling
- Optional: crushed Oreos, dried cranberries, or festive sprinkles
Step-by-Step Instructions:
- Prepare Your Workspace: Line a baking sheet with parchment paper or a silicone baking mat. Make sure your surface is level so the chocolate spreads evenly.
- Melt the Chocolate: Place dark chocolate chips in a microwave-safe bowl. Microwave in 30-second intervals, stirring thoroughly between each interval, until completely melted and smooth. This usually takes 1-2 minutes total. Don’t rush this step – stirring prevents burning.
- Spread It Out: Pour the melted chocolate onto your prepared baking sheet. Use a spatula or the back of a spoon to spread it into a thin, even layer about ¼-inch thick. The thinner you spread it, the crispier your bark will be.
- Add the Peppermint: Immediately sprinkle the crushed candy canes evenly over the melted chocolate while it’s still warm. This helps the pieces stick perfectly.
- Optional White Chocolate Drizzle: If using white chocolate, melt it the same way as the dark chocolate. Transfer to a small zip-top bag, snip off a tiny corner, and drizzle decoratively over the bark in zigzag patterns.
- Set the Bark: Place the baking sheet in the refrigerator or freezer for 10 minutes until the chocolate is completely hardened and firm to the touch.
- Break and Serve: Once set, break the bark into irregular, rustic pieces. This gives it that artisanal, homemade look!
Pro Tips & Variations:
- Crushing Candy Canes: Keep candy canes in their wrappers and crush with a rolling pin for easy cleanup and perfectly sized pieces
- Temperature Matters: Make sure chocolate isn’t too hot when adding toppings, or they’ll melt
- Storage: Store in an airtight container in a cool place (not refrigerated) for up to 2 weeks
- Gift Packaging: Layer pieces between parchment paper in decorative tins or wrap individual pieces in clear cellophane bags tied with ribbon
- Flavor Variations: Try using crushed gingerbread cookies, dried cranberries, toasted pecans, or sea salt
- Double Chocolate: Use white chocolate as the base and drizzle with dark chocolate for a reverse effect
2. No-Bake Oreo Truffles
Decadent Chocolate Perfection
These luxurious chocolate truffles taste like they came from a high-end candy shop, but they’re surprisingly simple to make with just three basic ingredients. The best part? No baking, no candy thermometer, no fancy equipment required!
Why You’ll Love It:
- Only 3 ingredients needed
- No baking required
- Impressive and elegant
- Can be made ahead
- Freezer-friendly
Ingredients:
- 20 Oreo cookies (any variety works!)
- 4 oz (115g) cream cheese, softened to room temperature
- ½ cup melted chocolate for coating (dark, milk, or white)
- Optional: additional melted chocolate for drizzling
- Optional: crushed candy canes, sprinkles, or cocoa powder for rolling
Step-by-Step Instructions:
- Crush the Cookies: Place all 20 Oreos (including the cream filling) into a food processor. Pulse until they become fine, uniform crumbs. No food processor? No problem! Place cookies in a large zip-top bag, seal it, and crush them with a rolling pin until finely ground.
- Mix with Cream Cheese: Transfer the cookie crumbs to a large bowl. Add the softened cream cheese. Using a spoon or your hands, mix together until completely combined and the mixture forms a dough-like consistency. The mixture should hold together when squeezed.
- Form the Truffles: Scoop about 1 tablespoon of mixture at a time and roll between your palms to form smooth, round balls. Place on a parchment-lined baking sheet or plate. You should get about 20-24 truffles.
- Chill Briefly: Pop the tray in the freezer for 5-7 minutes. This firms them up and makes coating easier.
- Melt the Coating Chocolate: While truffles chill, melt your coating chocolate in 30-second microwave intervals, stirring between each, until smooth and completely melted.
- Coat the Truffles: Remove truffles from freezer. Using a fork or dipping tool, dip each truffle into the melted chocolate, making sure it’s completely covered. Let excess chocolate drip off by gently tapping the fork on the bowl’s edge.
- Set on Parchment: Place coated truffles back on parchment paper. While chocolate is still wet, drizzle with contrasting chocolate (white chocolate on dark, or vice versa) or sprinkle with crushed candy canes.
- Final Chill: Freeze for 10 minutes to set the chocolate coating completely.
Pro Tips & Variations:
- Cream Cheese Temperature: Room temperature cream cheese mixes much easier and creates a smoother texture
- Uniform Size: Use a small cookie scoop for perfectly even truffles
- Flavor Twists: Try mint Oreos for peppermint truffles, golden Oreos for vanilla, or red velvet Oreos
- Rolling Alternative: Instead of chocolate coating, roll truffles in cocoa powder, powdered sugar, or crushed nuts
- Storage: Keep refrigerated in an airtight container for up to 1 week, or freeze for up to 3 months
- Decoration Ideas: Top with a small piece of candy cane, edible glitter, or gold dust for extra elegance
- Make Ahead: These can be made up to 2 days in advance
3. Mug Gingerbread Cake
Single-Serve Comfort in a Cup
This warm, spiced gingerbread cake is like a hug in a mug! It’s perfect for those cozy winter evenings when you want something sweet without making an entire cake. Plus, it cooks right in the microwave in under 2 minutes!
Why You’ll Love It:
- Ready in under 2 minutes
- Perfect portion control
- Minimal cleanup
- Customizable spice level
- No oven needed
Ingredients:
- 4 tablespoons all-purpose flour
- 2 tablespoons granulated sugar
- ½ teaspoon ground ginger
- ¼ teaspoon ground cinnamon
- Pinch of ground cloves (about ⅛ teaspoon)
- Pinch of nutmeg
- Pinch of baking powder
- 3 tablespoons milk (dairy or non-dairy)
- 1 tablespoon vegetable oil or melted butter
- 1 tablespoon molasses or honey
- ½ teaspoon vanilla extract
- Whipped cream for topping
Step-by-Step Instructions:
- Choose Your Mug: Select a large microwave-safe mug (at least 12-16 oz capacity). The cake will rise, so you need space!
- Mix Dry Ingredients: In your mug, add flour, sugar, ginger, cinnamon, cloves, nutmeg, and baking powder. Whisk together thoroughly with a fork to ensure spices are evenly distributed. Breaking up any lumps is important for a smooth cake.
- Add Wet Ingredients: Pour in milk, oil, molasses, and vanilla extract. Stir vigorously with a fork or small whisk until you have a completely smooth batter with no flour lumps. Scrape down the sides and bottom of the mug to incorporate everything.
- Microwave: Place mug in the center of your microwave. Cook on high power for 1 minute and 15 seconds. Check the center – it should look set and spring back when gently touched. If needed, microwave for an additional 15-30 seconds.
- Cool Briefly: Let the cake cool in the mug for about 1 minute. It will be very hot!
- Top and Serve: Add a generous dollop of whipped cream on top. Sprinkle with a dash of cinnamon or a small gingerbread cookie for decoration.
Pro Tips & Variations:
- Don’t Overfill: Fill the mug only halfway with batter to prevent overflow
- Microwave Variations: All microwaves differ in power. Start with less time and add more if needed
- Texture Preference: For a fudgier cake, undercook slightly; for a drier cake, add 15 seconds
- Flavor Boost: Add a tablespoon of chocolate chips or chopped crystallized ginger to the batter
- Topping Ideas: Try vanilla ice cream, caramel sauce, cream cheese frosting, or lemon glaze
- Sugar Alternatives: Replace sugar with honey or maple syrup for different flavor profiles
- Make It Richer: Use melted butter instead of oil and add an extra tablespoon for decadence
- Spice Mix Substitute: In a pinch, use 1 teaspoon of pumpkin pie spice instead of individual spices
4. 10-Minute Cheesecake Cups
Elegant Individual Desserts
These gorgeous layered cheesecake cups look like they came from an upscale restaurant but take just minutes to assemble. They’re perfect for holiday parties because everyone gets their own beautiful serving, and there’s no slicing required!
Why You’ll Love It:
- No baking required
- Perfect for parties
- Beautiful presentation
- Make-ahead friendly
- Completely customizable
Ingredients:
- ½ cup graham cracker crumbs (about 4-5 crackers crushed)
- 2 tablespoons melted butter
- ½ cup cream cheese, softened
- ½ cup whipped cream or Cool Whip
- 2-3 tablespoons powdered sugar
- ½ teaspoon vanilla extract
- ¼ cup cherry pie filling, or any fruit topping
- Optional: fresh mint leaves for garnish
Step-by-Step Instructions:
- Prepare the Crust: In a small bowl, mix graham cracker crumbs with melted butter until the texture resembles wet sand. The mixture should clump together when pressed.
- Layer the Base: Divide the graham cracker mixture evenly among 4 small cups or clear glasses (about 6-8 oz each). Press down firmly with the back of a spoon or your fingers to create a compact base layer. Clear glasses show off the beautiful layers!
- Make the Cheesecake Filling: In a medium bowl, beat the softened cream cheese with powdered sugar and vanilla extract until completely smooth and fluffy, about 2 minutes with an electric mixer or vigorous hand whisking.
- Fold in Whipped Cream: Gently fold the whipped cream into the cream cheese mixture using a spatula. Use a folding motion rather than stirring to keep it light and airy. The mixture should be smooth, creamy, and fluffy.
- Assemble the Layers: Spoon or pipe the cream cheese mixture over the graham cracker base in each cup, dividing evenly. For a professional look, use a piping bag or a zip-top bag with the corner snipped off.
- Add Topping: Spoon about 1 tablespoon of cherry pie filling (or your chosen topping) on top of each cheesecake cup. Spread it gently to cover the surface.
- Chill and Set: Place cups in the refrigerator or freezer for 10 minutes to set slightly. They can be served immediately if you prefer a softer texture, or chilled for several hours for firmer results.
- Garnish: Just before serving, add a small mint leaf or extra whipped cream for decoration.
Pro Tips & Variations:
- Crust Alternatives: Try vanilla wafer crumbs, Oreo crumbs, or gingerbread cookie crumbs
- Make It Firmer: Add 1 tablespoon of sour cream to the filling for a tangier, firmer texture
- Fruit Toppings: Try blueberry pie filling, strawberry sauce, lemon curd, or caramel
- Chocolate Version: Mix 2 tablespoons of cocoa powder into the cream cheese layer
- Storage: These can be made up to 24 hours ahead and stored covered in the refrigerator
- Individual Serving Ideas: Use wine glasses, mason jars, or dessert shot glasses for variety
- Piping Technique: For clean layers, use a piping bag to create neat, even cheesecake layers
- Fresh Fruit Option: Top with fresh berries, sliced strawberries, or pomegranate seeds
5. Hot Chocolate Dip
Interactive Dessert Fun
This warm, velvety chocolate dip transforms ordinary cookies and fruits into an extraordinary dessert experience. It’s interactive, fun, and perfect for entertaining during the holidays. Kids and adults alike will love gathering around to dip their favorite treats!
Why You’ll Love It:
- Interactive and social
- Versatile dipping options
- Rich and indulgent
- Ready in minutes
- Great for parties
Ingredients:
- ½ cup chocolate chips (milk, dark, or semi-sweet)
- 2 oz cream cheese (2 tablespoons) OR ¼ cup heavy cream
- 2 tablespoons mini marshmallows, plus more for topping
- Optional: pinch of sea salt
- Optional: ¼ teaspoon peppermint extract
For Dipping:
- Graham crackers
- Vanilla wafers
- Biscotti
- Pretzels
- Strawberries
- Banana slices
- Apple slices
- Marshmallows
- Pound cake cubes
Step-by-Step Instructions:
- Combine Ingredients: In a microwave-safe bowl, add chocolate chips and cream cheese (or heavy cream). Don’t mix yet – just place them together.
- Melt the Chocolate: Microwave on high for 30 seconds. Remove and stir. Continue microwaving in 30-second intervals, stirring between each, until chocolate is completely melted and mixture is smooth. This usually takes 1-2 minutes total.
- Add Marshmallows: Stir in mini marshmallows while the chocolate is still hot. Some will melt completely while others will create beautiful swirls. For extra marshmallow flavor, add a dash of marshmallow fluff.
- Season: Add a tiny pinch of sea salt to enhance the chocolate flavor. If making peppermint hot chocolate dip, stir in peppermint extract.
- Transfer to Serving Bowl: Pour the warm dip into a pretty serving bowl. Top with additional mini marshmallows and a sprinkle of cocoa powder or crushed candy canes.
- Arrange Dippers: Arrange your chosen dipping items on a platter around the chocolate dip. Variety is key – offer sweet and salty options!
- Serve Immediately: This dip is best enjoyed warm. If it starts to thicken as it cools, simply microwave for 15-20 seconds and stir.
Pro Tips & Variations:
- Keep It Warm: Place the serving bowl over a lit tea candle or use a small fondue pot to keep dip warm throughout serving
- Consistency Control: If dip is too thick, add a tablespoon of milk. If too thin, add more melted chocolate chips
- Flavor Variations: Try adding espresso powder for mocha dip, or caramel sauce for salted caramel chocolate
- Adult Version: Add 1 tablespoon of Irish cream liqueur or peppermint schnapps
- Presentation: Use a small slow cooker on warm setting for extended serving at parties
- Dipping Board: Create a dessert charcuterie board with the dip as the centerpiece
- Reheating: Reheat leftovers in 15-second bursts, stirring between each
- Make It Special: Top with whipped cream, chocolate shavings, or crushed Oreos
6. Strawberry Santa Hats
Adorably Festive Treats
These whimsical strawberry Santa hats are almost too cute to eat! They’re the perfect combination of fresh fruit and sweet cream, making them a slightly healthier option that still feels indulgent. Kids absolutely love making these, and they’re a showstopper at any holiday gathering.
Why You’ll Love It:
- Adorable presentation
- Fresh and light
- Kid-friendly to make
- Great for parties
- Healthier dessert option
Ingredients:
- 10 large strawberries, washed and thoroughly dried
- ½ cup whipped cream (or vanilla frosting for stability)
- Optional: powdered sugar for dusting
- Optional: fresh mint leaves for garnish
For Stabilized Whipped Cream (optional but recommended):
- ½ cup heavy cream
- 1 tablespoon powdered sugar
- ½ teaspoon vanilla extract
- ½ teaspoon unflavored gelatin dissolved in 1 tablespoon warm water
Step-by-Step Instructions:
- Prepare the Strawberries: Wash strawberries and pat them completely dry with paper towels. This is crucial – any moisture will make the cream slide off. Remove the green leafy tops by slicing them off, creating a flat surface. Set the green tops aside.
- Cut the Strawberries: Using a sharp knife, cut each strawberry horizontally about two-thirds of the way up from the bottom. You’ll have a larger bottom piece and a smaller, pointy top piece that will become Santa’s “hat.”
- Prepare Your Workspace: Arrange all your bottom strawberry pieces cut-side down on a serving platter or individual plates. This creates a stable base.
- Make Stabilized Whipped Cream (if using): Beat heavy cream with powdered sugar and vanilla until soft peaks form. Add dissolved gelatin and beat until stiff peaks form. This keeps the cream from melting or sliding.
- Add the Cream “Body”: Place a generous dollop of whipped cream (about 1-2 tablespoons) on top of each bottom strawberry piece. If using a piping bag with a star tip, pipe a nice swirl for professional results. The cream represents Santa’s fluffy white body and beard.
- Place the Hat: Take the pointed strawberry top (the “hat”) and place it at a slight angle on top of the whipped cream. Position it so it looks like Santa’s hat sitting on his head. Press very gently to secure.
- Add the Pom-Pom: Using a piping bag or a small spoon, add a tiny dollop of whipped cream at the very tip of each strawberry “hat” to create Santa’s pom-pom.
- Finishing Touches: Lightly dust with powdered sugar to create a “snowy” effect. Add a small mint leaf near the base for a holly leaf decoration.
- Chill if Needed: If not serving immediately, refrigerate for up to 2 hours. Don’t make these more than 2-3 hours ahead or the strawberries will release moisture.
Pro Tips & Variations:
- Berry Selection: Choose large, uniform strawberries for the best Santa hats
- Stabilized Cream: For firmer results that hold up longer, use cream cheese frosting tinted white
- Make Them Stand: Cut a tiny slice off the bottom of each strawberry base so they don’t roll
- Assembly Line: Set up an assembly station and let kids help create their own Santa hats
- Chocolate Option: Dip the strawberry “hats” in melted white chocolate before assembly
- Color Variation: Use golden kiwi instead of strawberries for “yellow hat” Santas
- Storage: Best served within 2-3 hours of assembly for optimal freshness
- Serving Suggestion: Arrange on a Christmas tree-shaped platter or cake stand for dramatic presentation
- Portion Size: These are perfect as light desserts after a heavy meal
Essential Time-Saving Tips for Holiday Baking
Planning Ahead
The secret to stress-free holiday baking is smart planning. Here’s how to maximize efficiency:
Batch Prep Ingredients:
- Pre-measure dry ingredients into labeled bags or containers
- Soften cream cheese and butter ahead of time
- Pre-crush cookies, candy canes, or graham crackers
- Keep chocolate chips, marshmallows, and toppings readily accessible
Double Batches: Many of these recipes can be easily doubled or tripled. When making chocolate bark or Oreo truffles, consider making extra batches for gifts or unexpected guests.
Strategic Scheduling:
- Make Oreo truffles and chocolate bark up to 3 days ahead
- Prepare cheesecake cups up to 24 hours in advance
- Assemble strawberry Santa hats 2-3 hours before serving
- Make hot chocolate dip and mug cakes right before serving
Storage and Shelf Life Guide
Peppermint Chocolate Bark:
- Room temperature in airtight container: 2 weeks
- Refrigerator: 3 weeks (may develop white “bloom” but still safe to eat)
- Freezer: 2 months
Oreo Truffles:
- Refrigerator: 1 week
- Freezer: 3 months (thaw in fridge before serving)
Mug Gingerbread Cake:
- Best enjoyed immediately
- Can refrigerate for 1 day and reheat 20-30 seconds
Cheesecake Cups:
- Refrigerator: 2 days
- Not recommended for freezing (texture changes)
Hot Chocolate Dip:
- Best served immediately
- Can refrigerate for 3 days and reheat gently
Strawberry Santa Hats:
- Best served within 2-3 hours of assembly
- Components can be prepped separately and assembled before serving
Dietary Modifications and Substitutions
Making These Treats Work for Everyone
Gluten-Free Options:
- Use gluten-free cookies in place of regular Oreos
- Substitute gluten-free graham crackers in cheesecake cups
- Use certified gluten-free chocolate
Dairy-Free Alternatives:
- Use coconut cream or cashew cream instead of dairy cream
- Substitute dairy-free cream cheese
- Choose dairy-free chocolate chips
- Use coconut whipped cream for toppings
Reduced Sugar:
- Use sugar-free chocolate chips
- Replace some sugar with stevia or monk fruit sweetener
- Use fresh fruit toppings instead of pie filling
- Choose dark chocolate (70% cacao or higher) for less sugar
Vegan Modifications:
- Use vegan cream cheese and whipped topping
- Choose dairy-free chocolate
- Replace butter with coconut oil
- Use plant-based milk in mug cake
Creative Presentation Ideas
Making Your Desserts Instagram-Worthy
Dessert Boards: Create a stunning dessert charcuterie board featuring several of these treats arranged artfully with:
- Fresh holly or pine boughs (non-edible decoration)
- Decorative serving pieces
- Small name tags for each dessert
- Festive napkins and dessert plates nearby
Gift Packaging:
- Chocolate bark in clear cellophane bags tied with ribbon
- Oreo truffles in small boxes lined with tissue paper
- Mini mason jars filled with cheesecake cup layers
- Cookie tins lined with parchment paper for multiple treats
Party Presentation:
- Tiered cake stands displaying strawberry Santa hats
- Fondue fountain with hot chocolate dip
- Individual serving glasses for cheesecake cups
- Decorative mug rack for displaying mug cake ingredients
Photo Styling Tips:
- Use festive backgrounds (red, green, gold, or white)
- Add holiday props like ornaments, pine cones, or cinnamon sticks
- Photograph in natural light when possible
- Include serving utensils in shots for scale and context
Hosting a Quick Dessert Party
Using These Recipes to Entertain
These six desserts are perfect for hosting a casual holiday dessert party with minimal stress:
Set Up Stations:
- Make-Your-Own Chocolate Bark Station: Provide melted chocolate, various toppings, and let guests create custom bark
- Truffle Rolling Table: Have Oreo mixture ready and let guests roll and coat their own
- Hot Chocolate Dip Bar: Arrange dippers around warm chocolate dip
- Santa Hat Assembly Line: Provide components and let kids build strawberry Santas
Timeline for a 2-Hour Party:
- 2 days before: Make Oreo truffles and chocolate bark
- Day before: Prepare cheesecake cups (without fruit topping)
- 1 hour before: Prepare strawberry Santa hat components, arrange dip station
- During party: Make mug cakes on demand, prepare hot chocolate dip
Common Questions and Troubleshooting
Why did my chocolate bark turn white? This is called “bloom” and happens when chocolate experiences temperature changes. It’s still safe to eat but can be prevented by storing at consistent cool room temperature.
My Oreo truffles are too soft to coat. Help! Freeze them for 10-15 minutes before dipping. Make sure cream cheese was properly softened but not melted before mixing.
Can I make mug cake in the oven? Yes! Bake at 350°F in an oven-safe mug or ramekin for 12-15 minutes.
My hot chocolate dip is too thick/thin. Add milk (one tablespoon at a time) to thin, or more melted chocolate to thicken.
Strawberry Santa hats keep falling apart. Make sure strawberries are completely dry and cream is thick enough. Use cream cheese frosting for more stability.
Can these be made ahead for a large event? Chocolate bark and truffles are perfect make-ahead options. Assemble cheesecake cups without topping. Make hot chocolate dip and mug cakes fresh.
Final Thoughts: The Joy of Simple Holiday Baking
The beauty of these 10-minute Christmas desserts lies not just in their speed, but in the joy they bring without the stress. Holiday baking should be fun, not overwhelming. These recipes prove that you don’t need hours in the kitchen or professional skills to create memorable, delicious treats that will delight your family and friends.
Each recipe is designed to be flexible and forgiving. Don’t worry about perfection – homemade treats are special because they’re made with love, not because they’re flawless. The slightly irregular pieces of chocolate bark, the unique shapes of hand-rolled truffles, and the charming imperfections of strawberry Santa hats add character and charm.
This holiday season, give yourself permission to take shortcuts. Use these quick recipes to spend less time in the kitchen and more time making memories with loved ones. After all, that’s what the holidays are truly about – being together, sharing joy, and creating moments that last long after the last cookie crumb has been eaten.
Whether you’re a busy parent, a working professional, a college student, or anyone who loves good food but has limited time, these recipes are your ticket to holiday baking success. They’ll help you create a home filled with the delicious aromas of chocolate, cinnamon, and peppermint without spending your entire day baking.
So grab your ingredients, put on some holiday music, and get ready to create some quick Christmas magic in your kitchen. Your future self (and your grateful guests) will thank you!
Leave a Reply