The Gastronomic Architecture: The “Hydration-Leavening” Duality
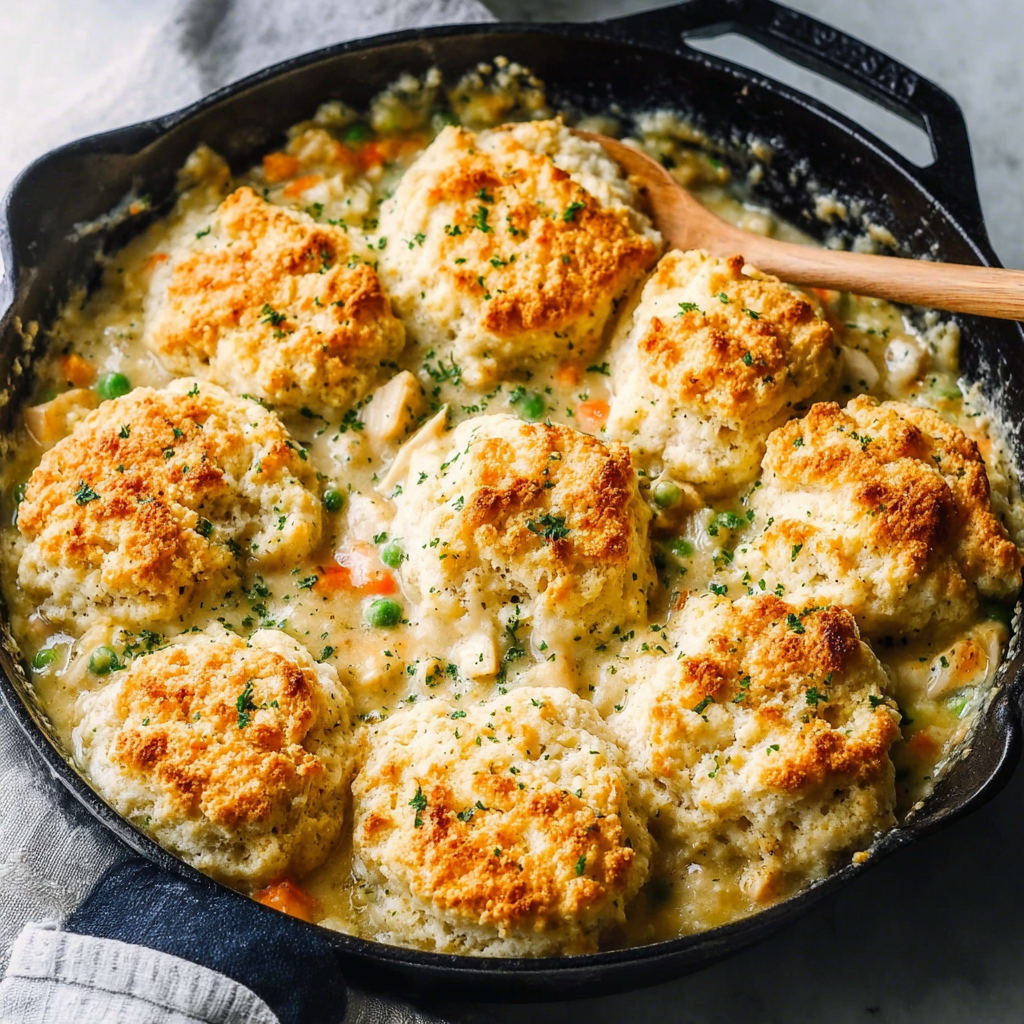
In the hierarchy of high-protein comfort, Cheddar Bay Biscuit Chicken Pot Pie represents a sophisticated study in Thermal Stratification and Lactic-Acid Leavening. The technical challenge lies in the “Soggy-Bottom” prevention: a standard pot pie crust can become gummy when in contact with the filling. By utilizing a Dropped Biscuit topping (specifically the garlic-herb-cheddar matrix), you create a porous, aerated “lid” that allows steam to escape while the bottom of the biscuit absorbs just enough savory gravy to become a “tender-crumb” bridge.
The objective is to achieve a High-Viscosity Filling—thick enough to support the weight of the heavy cheddar biscuits without them sinking and boiling into a doughy mass.
Essential Mise en Place: Technical Specs
To achieve a restaurant-grade “shatter-crisp” biscuit top and a velvet gravy, the temperature of the fats and the starch-to-liquid ratio are the most critical factors.
The Foundation (The Filling)
- Cooked Chicken (500g): Shredded or cubed. Using rotisserie chicken provides a “pre-seasoned” depth.
- Mixed Vegetables (300g): Peas, carrots, and corn. Expert Tip: If using frozen, thaw and pat dry to avoid diluting the gravy.
- Heavy Cream & Chicken Stock (250ml each): To provide the lipid-rich aqueous base.
The “Cheddar Bay” Matrix (The Topping)
- All-Purpose Flour (250g / 2 cups): Or a commercial “Biscuit Mix” shortcut.
- Sharp Cheddar (150g): Technical Requirement: Use a high-fat cheddar for the “lacework” melt.
- Cold Unsalted Butter (115g): Must be pea-sized crumbs to create steam pockets during baking.
- The Aromatic Finish: Garlic powder, dried parsley, and melted butter for the final “glaze.”
The Masterclass: Step-by-Step Culinary Execution
Phase 1: The “Velouté” Thickening
In a large skillet, melt butter and whisk in an equal part of flour to create a Blond Roux. Slowly whisk in the stock and cream. Technical Requirement: Simmer until the sauce coats the back of a spoon. If the filling is too thin, the biscuits will submerge. Stir in the chicken and vegetables.
Phase 2: The “Short-Crumb” Biscuit Prep
In a separate bowl, cut the cold butter into the flour and garlic powder until it looks like coarse meal. Fold in the shredded cheddar and buttermilk (or milk). Expert Tip: Do not over-mix. You want visible “lumps” of butter; these are the engineers of the biscuit’s flaky height.
Phase 3: The “Suspension” Assembly
Pour the hot filling into a baking dish. Drop large spoonfuls of the biscuit dough onto the surface. Technical Requirement: Leave small gaps between the biscuits. This allows steam from the filling to vent, preventing the biscuits from steaming (becoming gummy) instead of baking (becoming crisp).
Phase 4: The “Garlic-Butter” Glaze
Bake at 200°C (400°F) for 20–25 minutes until the biscuits are golden brown and the filling is bubbling. Immediately upon removal, brush the hot biscuit tops with a mixture of melted butter, garlic salt, and parsley. This “Flash-Infusion” creates the signature “Bay” flavor profile.
Common Technical Pitfalls to Avoid
- Sunken Biscuits: Caused by a filling that is too watery or not hot enough when the dough is added. Ensure the filling is simmering before the biscuits go on top.
- Raw Biscuit Centers: If the biscuits are too large, the tops will burn before the centers cook. Keep each “drop” to roughly the size of a golf ball.
- The “Lava” Burn: Because of the high fat and starch content, this dish retains heat obsessively. Let it rest for 10 minutes to allow the gravy to set before serving.
Frequently Asked Questions (Q&A)
| Question | Expert Answer |
|---|---|
| Can I make it in one pot? | Yes. Use an oven-safe cast iron skillet for the filling, then drop the biscuits directly in and move the whole pan to the oven. |
| Why cold butter? | Cold butter creates steam pockets as it melts in the oven, which is what makes the biscuits “rise” and stay light. |
| Can I use a biscuit mix? | Absolutely. Use a “Red Lobster” style mix, add the cheese, and follow the Phase 3 assembly instructions. |
Leave a Reply