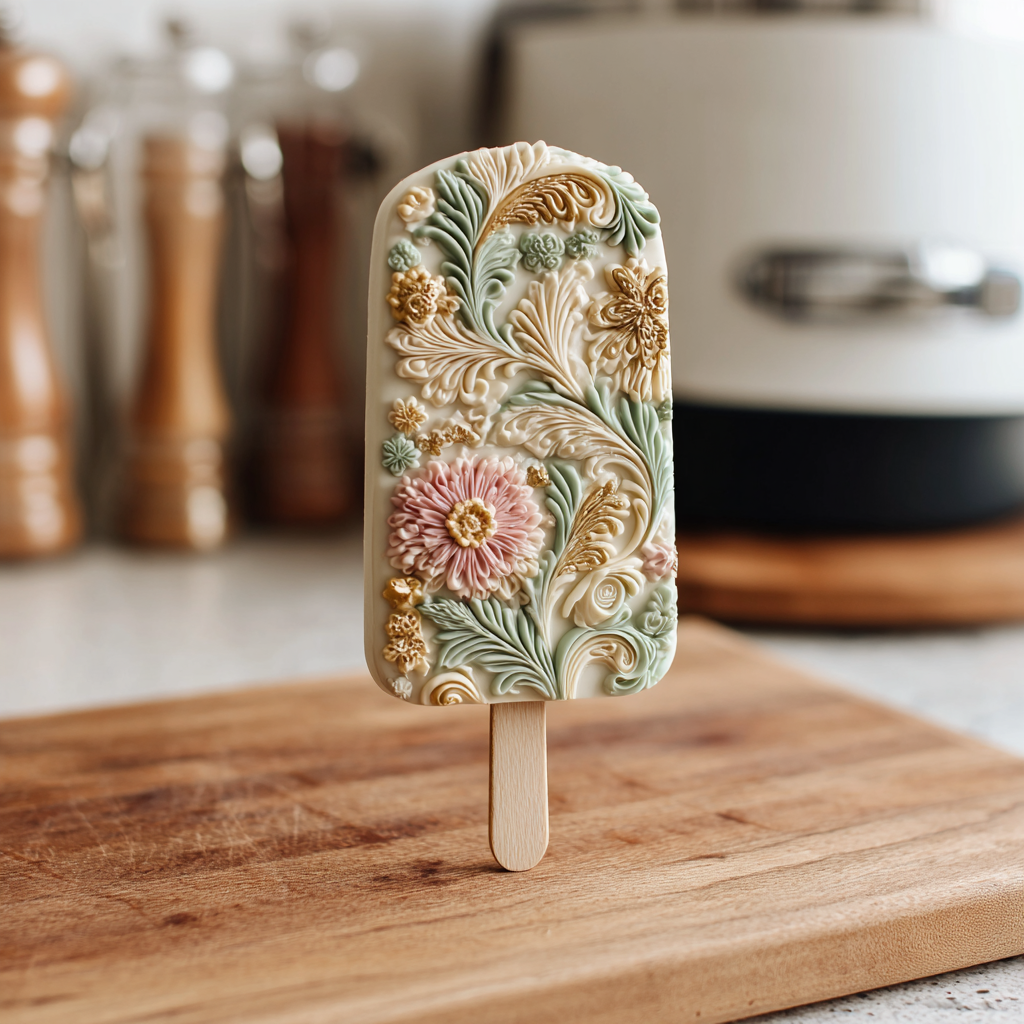
These Ornate Floral Cream Popsicles are inspired by delicate carved floral designs and soft pastel tones. They’re not only delicious — creamy, smooth, and lightly sweet — but visually stunning, perfect for special gatherings, tea parties, weddings, or aesthetic photography.
Their buttery pastel colors (pink, cream, and soft green) give them an elegant handcrafted look, echoing vintage carved popsicle styles. Made with a simple creamy base, these popsicles require no special equipment except a mold.
🌼 Why You’ll Love These Popsicles
- ultra–creamy texture thanks to condensed milk + cream
- soft pastel colors create a carved-flower aesthetic
- simple ingredients
- endlessly customizable with flavors and colors
- look impressive but are extremely easy to prepare
Ingredients
Creamy Base
- 2 cups whole milk
- 1 cup heavy cream
- ½ cup sweetened condensed milk
- 2 tablespoons honey or white sugar
- 2 teaspoons vanilla extract
Coloring (optional but recommended)
- 1–2 drops pastel pink food coloring
- 1 drop pastel green coloring
- Edible gold dust (optional, for accents)
- Edible flower petals (optional for decoration)
Timing
- Prep: 10 minutes
- Cooling: 10 minutes
- Freezing: 6 hours or overnight
- Total: ~6 hours 20 minutes
Step-by-Step Instructions
1. Prepare the creamy vanilla mixture
In a medium saucepan, combine:
- milk
- cream
- condensed milk
- honey/sugar
- vanilla
Warm over low heat for 3–4 minutes until fully blended.
Do not boil. Remove from heat and let cool.
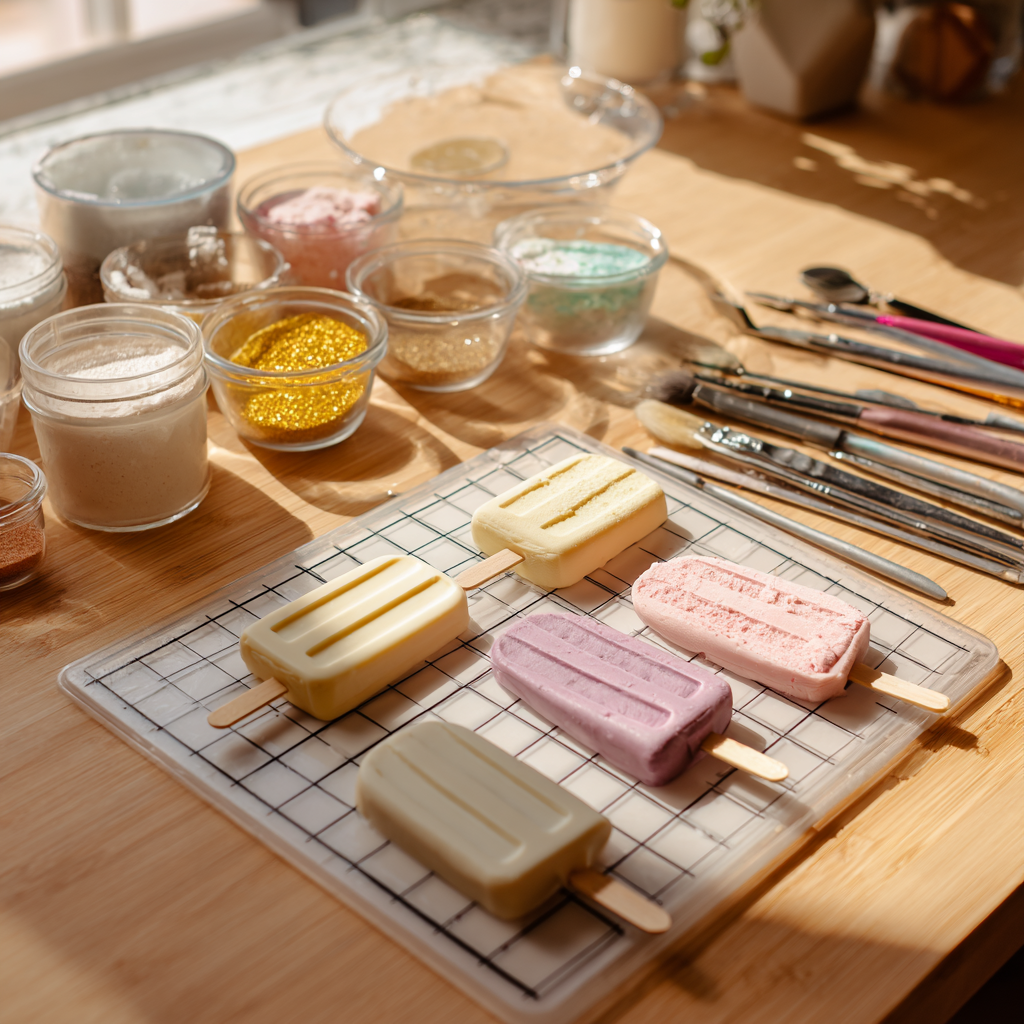
2. Divide and color the mixture
Pour the base into 3 small bowls:
- Bowl 1: Leave cream/white
- Bowl 2: Add 1 tiny drop of pastel pink
- Bowl 3: Add 1 tiny drop of pastel green
Stir gently — the goal is soft watercolor-like tones.
3. Prepare the mold for artistic detail
For popsicles that imitate carved florals:
- Place a few tiny edible petals or micro-flowers in the mold.
- Optional: paint the mold interior lightly with edible gold dust for accents (use a clean food-safe brush).
This creates beautiful detail once frozen.
4. Create layered floral colors
Pour the colored mixtures in thin layers into each mold:
- Start with cream
- Add a thin stripe of pink
- Add green
- Repeat until filled
Do not mix — the layers will settle softly and create depth like carved petals.
Insert wooden popsicle sticks.
5. Freeze
Freeze the popsicles for at least 6 hours, preferably overnight, until fully firm.
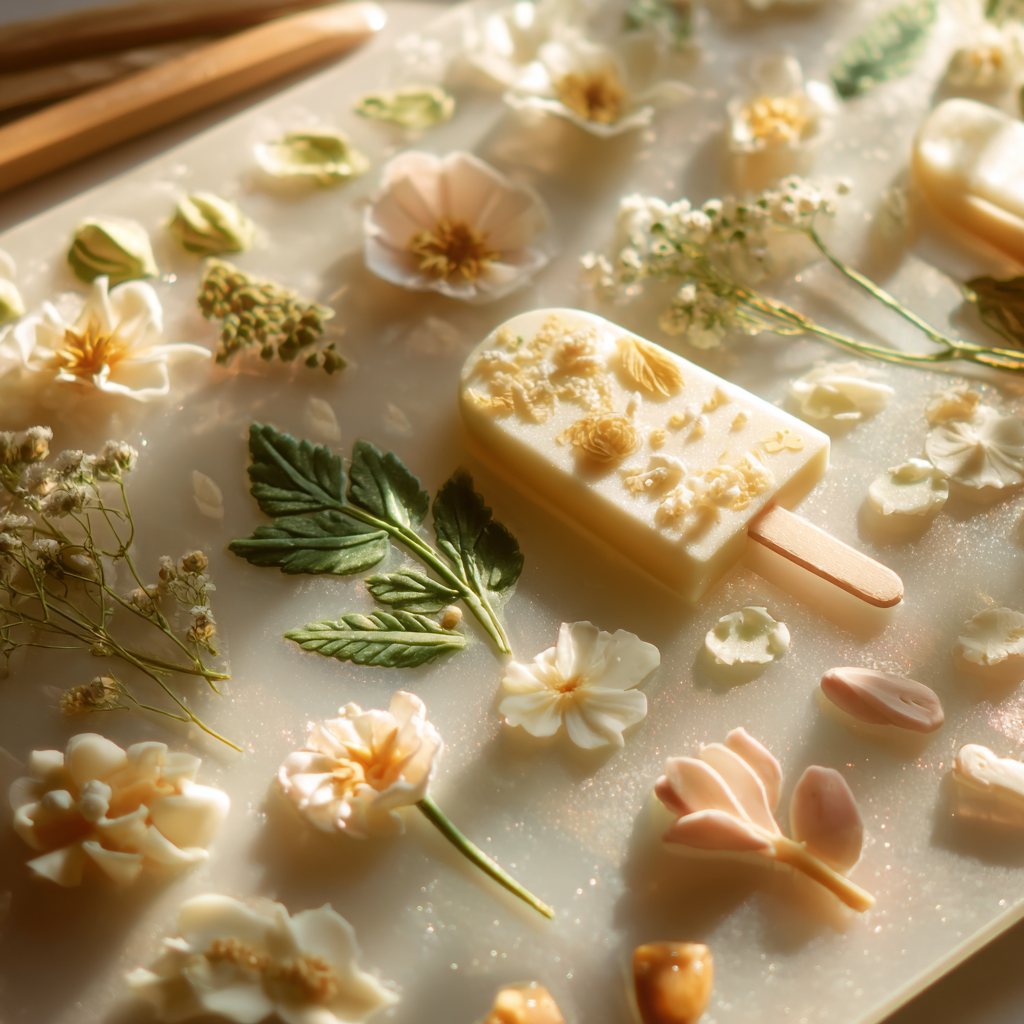
6. Unmold and finish
Dip the mold briefly in warm water to release the popsicles.
For extra elegance:
- Brush tiny gold accents on raised areas
- Keep slightly frosty for photography (matches your described image style)
Serve immediately or store in freezer bags.
Variations
🌸 Rose Vanilla Popsicles
Add 1 teaspoon rose water + extra pink coloring.
🍃 Matcha Flower Popsicles
Add 1 teaspoon matcha powder to the green portion.
🍑 Peach Cream Popsicles
Blend ½ cup peach purée into the cream mixture.
Tips for Perfect Floral Popsicles
- Use gel food coloring for softer pastel tones.
- Don’t overfill the mold — leave space for the stick.
- Freeze slowly to avoid ice crystals.
- Add edible petals only at the front of the mold for maximum detail.
Serving Suggestions
- Serve on a chilled marble tray for a luxury aesthetic.
- Decorate with real flowers for photography.
- Pair with iced tea, lemonade, or floral drinks.
FAQs
1. Can I make these dairy-free?
Yes — use coconut milk + coconut cream instead.
2. Can I use natural colors?
Yes: beet powder (pink), matcha (green), turmeric (gold).
3. How long do they last in the freezer?
Up to 2 months if stored airtight.
Leave a Reply