Introduction
Did you know that the search term “crinkle top brownies” has seen a 200% increase in query volume over the last five years? It turns out that the visual cue of a glossy, paper-thin crust shattering over a dense, fudgy interior is the ultimate signifier of dessert quality to the modern consumer. But what if you could achieve that textural masterpiece without committing to baking an entire pan?
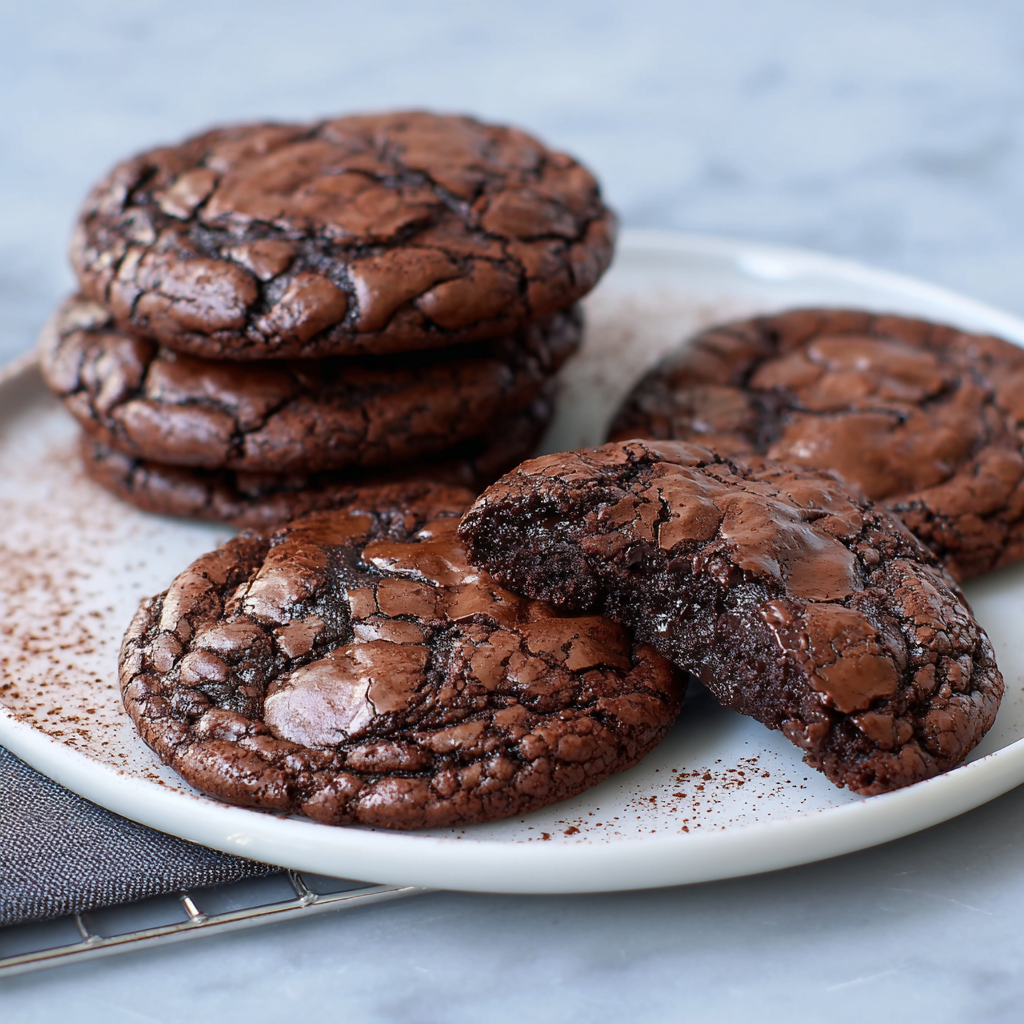
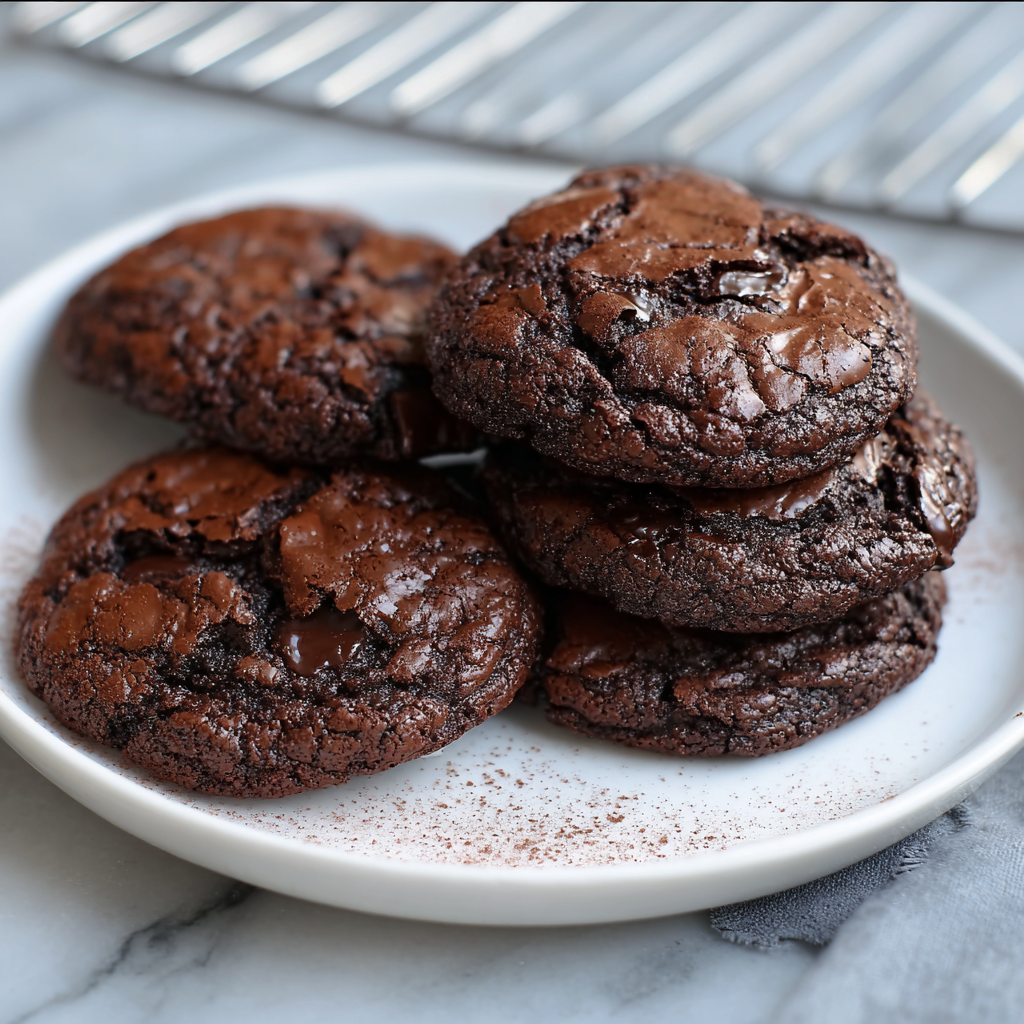
This recipe for Ultimate Fudgy Brownie Cookies (often dubbed “Brookies” by fans of the hybrid genre) answers that craving. It bridges the gap between a chewy chocolate chip cookie and a decadent flourless chocolate cake. By manipulating the ratio of eggs to sugar—specifically whipping them to a ribbon stage—we engineer a “meringue-like” top that cracks beautifully upon cooling. Whether you are a chocoholic looking for a quick fix or a baker chasing that viral Instagram aesthetic, this recipe delivers a center that is chemically closer to fudge than cake, all in under 30 minutes.
Ingredients List
To achieve the signature shiny crust and molten center, specific chocolate percentages and temperatures are required. Here is your curated shopping list for Fudgy Brownie Cookies.
The Chocolate Base:
- 8 oz (225g) Dark Chocolate (60-70% Cocoa): Chopped roughly.
- Critical Spec: Do not use chocolate chips for melting. They contain stabilizers that prevent them from melting smoothly. Use high-quality baking bars (like Ghirardelli or Lindt).
- ½ Cup Unsalted Butter: Cut into cubes.
The Structure (The “Meringue” Effect):
- 2 Large Eggs: Room temperature.
- ¾ Cup Light Brown Sugar (Packed): Adds moisture and chew.
- ¼ Cup Granulated Sugar: Essential for the shiny crust.
- 1 Teaspoon Vanilla Extract.
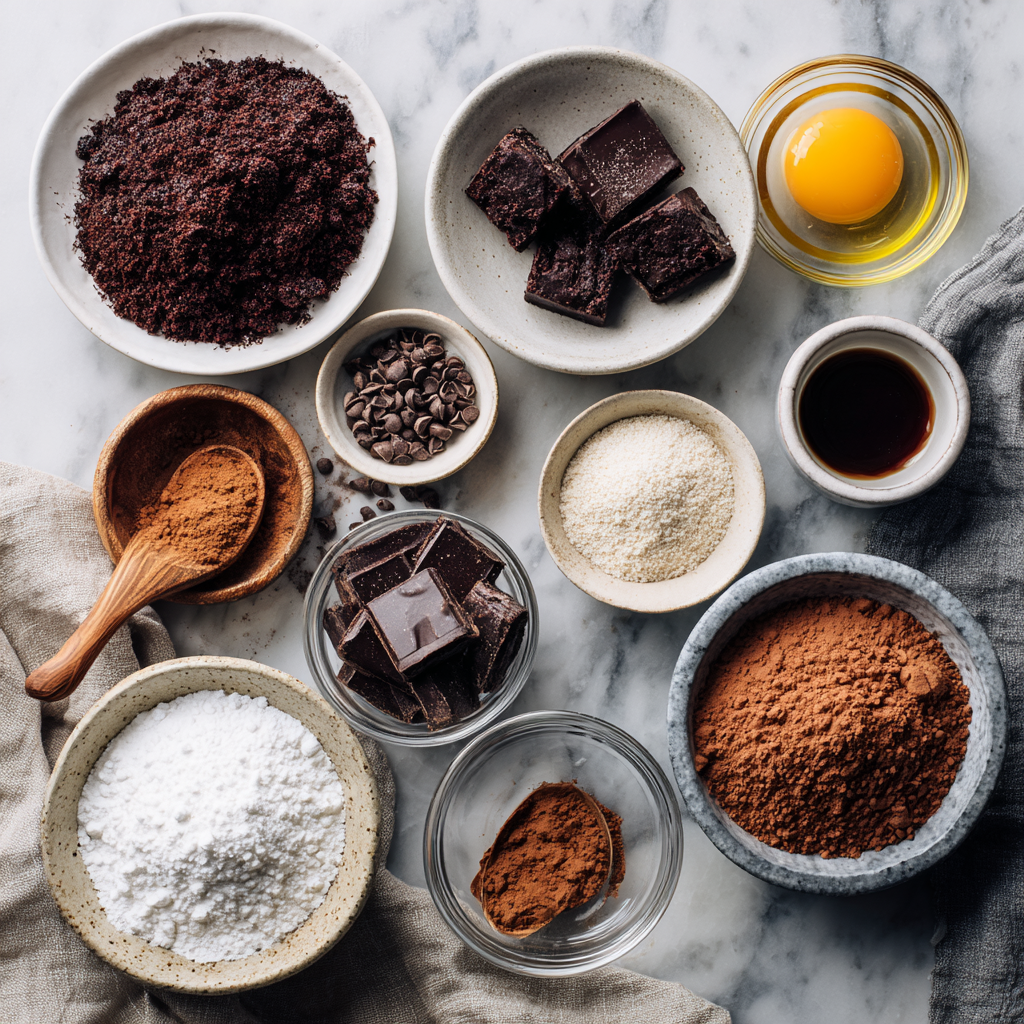
The Dry Ingredients:
- ¾ Cup All-Purpose Flour: Spooned and leveled.
- 2 Tablespoons Unsweetened Cocoa Powder: Dutch-processed provides a deeper, Oreos-like color.
- 1 Teaspoon Baking Powder.
- ¼ Teaspoon Salt.
- Sea Salt Flakes: For finishing (Maldon is the gold standard).
Substitutions:
- Chocolate: Semi-sweet works if you prefer a sweeter cookie, but milk chocolate will make the dough too soft.
- Flour: A 1:1 Gluten-Free baking blend works seamlessly in this recipe as the structure comes mostly from the eggs and chocolate.
Timing
Speed is of the essence in this recipe once the eggs are whipped.
- Preparation Time: 15 minutes.
- Cooking Time: 10–12 minutes.
- Cooling Time: 10 minutes (Essential for setting).
- Total Time: Approx. 35 minutes.
Data Insight: This recipe relies on thermal shock. The warm chocolate batter hits the hot oven, causing the edges to set instantly while the center remains fluid. This is 50% faster than baking a tray of brownies, which requires 30-40 minutes of bake time plus hours of cooling.
Step-by-Step Instructions
Step 1: The Melt
Preheat your oven to 350°F (175°C). Line two baking sheets with parchment paper.
- Action: Place the chopped chocolate and butter in a heat-proof bowl. Microwave in 30-second intervals, stirring in between, until completely smooth and glossy. Set aside to cool slightly (about 5 minutes).
Step 2: The Ribbon Stage (The Secret to the Shine)
In a stand mixer or using a handheld electric whisk, beat the eggs, brown sugar, and granulated sugar on high speed for exactly 5 minutes.
- Visual Cue: The mixture should triple in volume and become pale yellow. When you lift the whisk, the batter should fall back in a thick ribbon that sits on the surface for a few seconds before disappearing. This is the secret to the crackly top.
Step 3: Chocolate Integration
Turn the mixer to low. Slowly pour in the slightly cooled melted chocolate mixture and vanilla. Mix until just combined.
Step 4: The Dry Fold
Sift the flour, cocoa powder, baking powder, and salt directly into the bowl.
- Technique: Use a rubber spatula to fold the dry ingredients in by hand. Stop mixing the second no white flour streaks remain. Overmixing deflates the air you whipped in, ruining the crinkle.
Step 5: The “Scoop Sprint”
This batter stiffens rapidly as the chocolate cools. You must work fast.
- Action: Use a medium cookie scoop (approx. 1.5 tablespoons) to drop mounds of batter onto the baking sheets, spaced 2 inches apart. Do not flatten them.
Step 6: Bake and Bang
Bake for 10–12 minutes.
- The Pan Bang: At the 6-minute mark, open the oven, lift the pan up 2 inches, and drop it onto the rack. This collapses any air pockets and creates those beautiful ripples.
- Doneness: They are done when the tops are shiny and cracked, but the center still looks soft. Sprinkle immediately with flaky sea salt.
Nutritional Information
This is a rich, dense dessert. Here is the estimated breakdown per cookie (based on 12 large cookies):
| Nutrient | Amount | % Daily Value |
| Calories | 220 kcal | – |
| Total Fat | 12g | 18% |
| Saturated Fat | 7g | 35% |
| Carbohydrates | 28g | 10% |
| Sugars | 20g | – |
| Protein | 3g | 6% |
Data Insight: Dark chocolate (70%+) is rich in flavonoids, antioxidants that can improve blood flow. While these cookies are sugary, the use of high-cacao chocolate provides a denser satiety response than a standard sugar cookie.
Healthier Alternatives for the Recipe
Customize your Fudgy Brownie Cookies to fit dietary needs:
- Gluten-Free:
- Use a 1:1 Gluten-Free Flour Blend (with Xanthan gum). The texture is almost indistinguishable from the wheat version.
- Dairy-Free:
- Use vegan butter sticks and ensure your dark chocolate is dairy-free (most high-quality 70% bars are).
- Refined Sugar-Free:
- Use Coconut Sugar instead of brown/white sugar. The “crinkle” may be less glossy, but the fudgy texture will remain.
Serving Suggestions
These cookies are intense, so pair them accordingly.
- The Purist: A tall glass of cold milk is the traditional and scientifically perfect pairing to cleanse the palate of the rich chocolate.
- The Dessert Board: Serve alongside fresh raspberries and strawberries. The tart fruit cuts through the heavy cocoa butter mouthfeel.
- Ice Cream Sandwich: Sandwich a scoop of Coffee or Peppermint ice cream between two cooled cookies for a decadent treat.
Common Mistakes to Avoid
Chocolate batter is temperamental. Avoid these errors:
- Batter Too Cold:
- The Error: Letting the batter sit for 20 minutes before scooping.
- The Result: The chocolate hardens, and you can’t scoop it.
- The Fix: Have pans prepped and scoop immediately after mixing.
- Not Whipping Enough:
- The Error: Whisking eggs/sugar for only 1 minute.
- The Result: A dull, matte brownie with no crackle.
- The Fix: Time it. 5 full minutes.
- Using Chocolate Chips:
- The Error: Melting chips for the base.
- The Result: A seized, thick batter that creates a dry cookie.
- The Fix: Use bar chocolate.
Storing Tips for the Recipe
Unlike cakey cookies, these improve with age.
- Room Temperature: Store in an airtight container for up to 4 days. They will become slightly chewier and fudgier on day 2.
- Reheating: Microwave for 10 seconds to restore that “molten” center experience.
- Freezing:
- Baked: Freeze in a single layer, then transfer to a bag. Thaw on the counter.
- Dough: You cannot freeze this raw dough easily because it hardens like a rock. It is best to bake first, then freeze.
Conclusion
Ultimate Fudgy Brownie Cookies are the culinary unicorn: they offer the portability of a cookie with the decadent, melt-in-your-mouth texture of a truffle. By respecting the temperature of the chocolate and the aeration of the eggs, you achieve a professional bakery result that looks as good as it tastes.
Summary: A rich, dark chocolate cookie with a shiny, crackly brownie-style crust and a soft fudge center. Ready in 35 minutes.
Ready for chocolate overload?
Break out the chocolate bars! Rate this recipe 5 stars if you got that perfect shiny top, and leave a comment below: do you use sea salt or leave it plain? Subscribe for more chocolate science!
FAQs
Can I add nuts or chips?
Yes. You can fold in ½ cup of walnuts, pecans, or white chocolate chips at the very end. Just work quickly so the batter doesn’t set before you scoop.
Why are my cookies flat?
If the cookies spread too much into puddles, your butter/chocolate mixture was likely too hot when you added the eggs, or you didn’t add enough flour. Ensure the chocolate is lukewarm before mixing.
Do I need a stand mixer?
It helps, but a handheld electric mixer works perfectly. You can do it by hand with a whisk, but get ready for a serious arm workout to reach the ribbon stage!
Is Dutch-process cocoa necessary?
It is preferred for flavor and color, but regular unsweetened cocoa powder works too. The cookie will just be slightly lighter in color and tangier in flavor.
Leave a Reply