
Introduction
If sunshine had a flavor, it would be this pie.
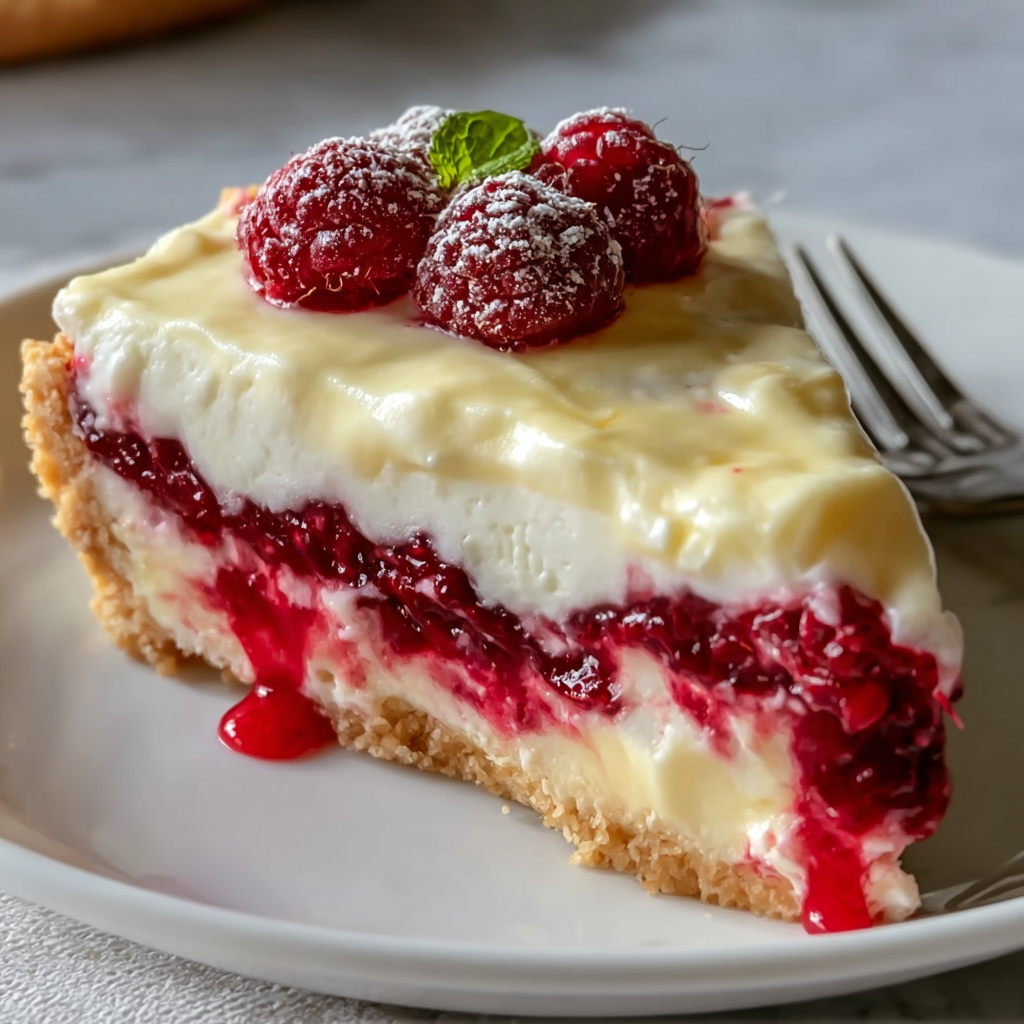
Lemon Raspberry Layered Pie is the dessert that ends the debate between “fruity” and “creamy.” It features three distinct textures and flavor profiles stacked in a single slice: a crunchy, buttery graham cracker foundation, a vibrant, tart raspberry compote, and a silky, cloud-like lemon mousse.
This is technically an “Icebox Pie,” meaning it relies on the refrigerator rather than the oven to do the heavy lifting. The acidity of the fresh lemon juice naturally thickens the cream filling (a process called acid coagulation), creating a sliceable texture without the need for gelatin or eggs. It is refreshing, visually stunning with its red-and-yellow layers, and remarkably easy to assemble.
Ingredients List
To get clean, distinct layers, we need to manage the moisture content of the fruit.

The Crunchy Base
- 1 ½ cups Graham Cracker Crumbs: (About 10 full sheets).
- 6 tbsp Unsalted Butter: Melted.
- ¼ cup Granulated Sugar: Helps the crust snap.
The Raspberry Layer (The Tart Punch)
- 12 oz (340g) Raspberries: Fresh or frozen.
- 2 tbsp Granulated Sugar: Adjust depending on berry sweetness.
- 1 tbsp Cornstarch dissolved in 1 tbsp Water: This slurry is crucial. It turns the berry juice into a stable gel so it doesn’t bleed into the lemon layer.
The Lemon Mousse (The Creamy Cloud)
- 8 oz (1 block) Cream Cheese: Full fat, softened to room temperature.
- Why Room Temp? If cold, it will leave lumps in your smooth mousse.
- 1 can (14 oz) Sweetened Condensed Milk.
- ½ cup Fresh Lemon Juice: (About 3 lemons). Do not use bottled juice; the flavor will be metallic.
- 1 tbsp Lemon Zest: For essential oils.
- 1 cup Heavy Whipping Cream: Cold.
The Garnish
- Fresh Raspberries, Lemon Slices, and Mint.
Sensory Note: The raspberry layer provides a concentrated “jammy” bite that cuts through the rich, sweet density of the condensed milk lemon layer.
Timing
This is a “chill-heavy” recipe. Active time is short, but patience is required.
- Prep Time: 30 minutes
- Cook Time (Sauce): 5 minutes
- Chilling Time: 6 hours (or overnight)
- Total Time: ~6.5 hours
Data Insight: The lemon filling thickens via a reaction between the citric acid and the milk proteins (casein) in the condensed milk. This reaction begins instantly, but the fat structure of the cream cheese needs roughly 4 hours at temperatures below 40°F to fully solidify into a sliceable state.
Step-by-Step Instructions
Step 1: The Crust
- In a medium bowl, mix graham cracker crumbs, sugar, and melted butter until it looks like wet sand.
- Press firmly into the bottom and up the sides of a 9-inch pie plate.
- Chill: Place in the freezer while you make the filling. (Optional: You can bake it at 350°F for 8 minutes for a nuttier flavor, but cool it completely before filling).
Step 2: The Raspberry Gel
- In a small saucepan, combine raspberries and sugar over medium heat. Cook for 5 minutes, mashing the berries with a spoon as they soften.
- Stir in the cornstarch slurry.
- Boil for 1 minute while stirring constantly until the mixture becomes very thick and glossy.
- Cool: Remove from heat and let it cool to room temperature.
- Layering: Spread this cooled raspberry jam gently over the bottom of the chilled crust. Place back in the fridge.
Step 3: The Lemon Mousse
- In a large mixing bowl, beat the softened cream cheese until completely smooth and fluffy (2 minutes).
- Slowly pour in the sweetened condensed milk, beating constantly. Scrape the bowl.
- Stir in the lemon juice and lemon zest. The mixture will thicken slightly as the acid hits the milk.
- In a separate bowl, whip the heavy cream until stiff peaks form.
- Fold: Gently fold the whipped cream into the lemon mixture. Do not overmix, or you will deflate the air.
Step 4: The Assembly
- Spoon the lemon mousse over the raspberry layer. Use a spatula to smooth the top.
- Tip: Be gentle so you don’t drag the red raspberry sauce up into the yellow lemon layer.
Step 5: The Long Chill
- Cover loosely with plastic wrap (tenting it so it doesn’t touch the surface).
- Refrigerate for at least 6 hours, preferably overnight. The longer it sits, the cleaner your slices will be.
Step 6: Serve
- Top with fresh berries and lemon twists just before serving.
Nutritional Information
A rich, decadent slice. Below is the estimated breakdown per slice (serves 8).
| Nutrient | Amount per Serving | % Daily Value* |
| Calories | 460 kcal | 23% |
| Total Fat | 28g | 43% |
| Saturated Fat | 16g | 80% |
| Carbohydrates | 48g | 16% |
| Sugars | 38g | – |
| Protein | 6g | 12% |
Variations for the Recipe
- Lime & Blueberry: Swap lemons for limes (Key Lime style) and raspberries for a blueberry compote.
- Pretzel Crust: Swap graham crackers for crushed pretzels. The saltiness pairs incredibly well with the tart lemon.
- Frozen Lemonade Pie: Place the finished pie in the freezer instead of the fridge. Serve semi-frozen for a texture like Italian Semifreddo.
- Shortbread Base: Use crushed Sandies or shortbread cookies for a buttery, vanilla-heavy crust.
Serving Suggestions
- The Drink: An Iced Earl Grey Tea or a glass of dry Prosecco.
- The Garnish: A dollop of extra whipped cream is never a bad idea.
Common Mistakes to Avoid
- Hot Raspberry Sauce:
- The Issue: Pouring hot berry compote onto the butter crust or topping it with mousse while warm.
- The Result: The butter in the crust melts (soggy bottom) and the mousse liquefies.
- The Fix: The raspberry layer must be cool to the touch before assembling.
- Lumpy Cream Cheese:
- The Issue: Using cold cream cheese.
- The Result: Little white chunks in your yellow mousse.
- The Fix: Microwave the cream cheese for 15 seconds if you forgot to take it out early.
- Runny Filling:
- The Issue: Using low-fat ingredients or not enough lemon juice.
- The Fix: The chemical reaction requires fat and acid. Use full-fat cream cheese and real lemon juice.
Storing Tips for the Recipe
- Refrigeration: Store covered in the fridge for up to 4 days.
- Freezing: This pie freezes excellently. Wrap tightly and freeze for up to 1 month. Thaw in the fridge for 2 hours before eating (or eat frozen!).
- Weeping: After day 3, the raspberry layer may release a little liquid into the crust. It’s still delicious, just softer.
Conclusion
Lemon Raspberry Layered Pie is a masterclass in balance. The sharp, citrusy mousse lifts the palate, while the deep, red berry layer anchors it with earthy sweetness. It looks like you bought it at a boutique bakery, but it requires zero oven time (if you skip the crust bake). It is the perfect impressive dessert for when you want maximum impact with minimal heat.
Ready to layer? Squeeze those lemons! If you try this recipe, please leave a star rating below and let us know: did you try the pretzel crust variation? Don’t forget to subscribe to our newsletter for more no-bake wonders.
FAQs
Q: Can I use store-bought lemon curd?
A: Yes. If you want to save time, skip the condensed milk/cream cheese mixture and just fold whipped cream into a jar of high-quality lemon curd. The texture will be lighter and less “cheesecake-like.”
Q: My pie didn’t set firm. Why?
A: Likely under-whipping the heavy cream or not chilling it long enough. The whipped cream provides the structure. If it’s soupy, freeze it and serve it as a frozen treat!
Q: Can I use Meyer lemons?
A: Yes, but Meyer lemons are sweeter and less acidic.1 You may need to add 1 tbsp of standard lemon juice to ensure the mixture thickens properly.
Leave a Reply