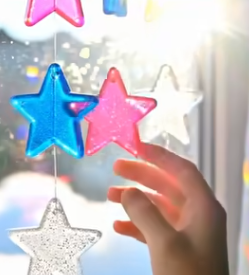
Transform your kitchen into a science lab with these DIY Bioplastic Star Ornaments. This project is a fantastic STEAM activity that allows children to explore simple chemistry while creating vibrant, eco-friendly decorations. Using a few common household staples, you can create “magic” stars that are sustainable and perfect for holiday display.
🧪 The Science Behind the Craft
This activity demonstrates how polymers can be created from natural materials. By combining cornstarch with a mild acid (vinegar) and heat, the starch molecules reorganize into a flexible, plastic-like substance. It’s a hands-on way to teach kids about chemical reactions and sustainable materials.
📝 Ingredients & Tools
Gather these items to begin your experiment:
- Cornstarch: 1 tablespoon.
- Water: 2 tablespoons.
- White Vinegar: 1 teaspoon.
- Food Coloring: 1–3 drops.
- Silicone Star Molds: To shape your bioplastic.
- Mixing Bowl: A small heat-safe bowl or cup.
- Stirring Tool: A spoon or stir stick.
Optional Enhancements:
- Glitter: For extra holiday sparkle.
- Glycerin: 1 drop (improves the final flexibility of the stars).
🕒 Timing: From Liquid to Solid
The creation process is quick, but the ornaments require time to fully cure and harden.
| Phase | Time Estimate | Notes |
| Preparation | 5 minutes | Mixing and coloring the base. |
| Heating | 2–5 minutes | Requires adult supervision. |
| Standard Set | 6–12 hours | At room temperature. |
| Fast Set | 20–30 minutes | In the refrigerator. |
🛠️ Step-by-Step Instructions
1. Mix the Base
In your heat-safe bowl, combine the cornstarch, water, and vinegar. Stir the mixture thoroughly until it is completely smooth and free of any lumps.
2. Add Color
Add 1–3 drops of food coloring to the mixture and stir well. If you want to make multiple colors, divide the base mixture into separate bowls before adding different colors to each.
3. Heat the Mixture (Adult Help Required)
Heating is essential to turn the liquid mixture into a thick gel.
- Microwave Method: Heat in 5–12 second intervals, stirring after each round, until the mixture becomes thick and glossy.
- Stovetop Method: Heat on low, stirring constantly, until it reaches the same thick, glossy consistency.
4. Fill the Molds
Carefully spoon the warm bioplastic into your silicone star molds. Gently tap the molds on the counter to remove any air bubbles. If you are using glitter, sprinkle it in now before the mixture begins to set.
5. Let Them Set
Allow the stars to sit at room temperature for 6–12 hours to fully harden. If you’re in a hurry, you can place the molds in the refrigerator for 20–30 minutes to speed up the process.
6. Remove and Enjoy
Once the stars are completely set and firm, gently pop them out of the silicone molds.
💡 Expert Customization Tips
- Adjusting Texture: If you want firmer ornaments, use slightly more cornstarch; if you prefer them softer, add a bit more water.
- Preventing Brittleness: Adding a single drop of glycerin to the initial mix provides the finished stars with more flexibility.
Leave a Reply