
Introduction
Did you know that the original candy cane, dating back to 17th-century Germany, was actually straight and pure white? It wasn’t until the 20th century that the iconic red stripes and peppermint flavor became the global symbol of Christmas.1 Today, search data reveals that “Candy Cane Cookies” are among the top 3 most requested holiday baking recipes in December, rivaling even the classic Gingerbread Man.
However, many home bakers are intimidated by this recipe. We have all seen the “Pinterest Fails”—cookies that spread into unrecognizable blobs or dough that crumbles before it can be twisted. This recipe for Easy Christmas Candy Cane Cookies is engineered to solve those structural structural issues. By adjusting the ratio of flour to butter and utilizing a “cold-dough” technique, we ensure that your ropes twist easily and hold their shape in the oven. These aren’t hard candies; they are tender, peppermint-infused shortbreads that melt in your mouth. Whether you are filling a holiday tin or looking for a kid-friendly baking project, this recipe delivers the nostalgic look of a candy cane without the need for boiling sugar.
Ingredients List
To achieve a dough that is pliable enough to roll but firm enough to hold the twist, the fat content and temperature are critical. Here is your curated shopping list for Easy Candy Cane Cookies.
The Shortbread Base:
- 1 Cup (2 sticks) Unsalted Butter: Softened, but cool to the touch.
- Scientific Note: If the butter is too warm (oily), the cookies will spread and lose their stripe definition.
- 1 Cup Confectioners’ Sugar (Powdered Sugar):
- Why Powdered? Unlike granulated sugar, cornstarch in powdered sugar keeps the cookie tender and prevents it from spreading too much.2
- 1 Large Egg: Room temperature.
- 1 Teaspoon Pure Vanilla Extract.
- 1 ½ Teaspoons Peppermint Extract:
- Critical Spec: Ensure it says Peppermint, not just “Mint” (which tastes like spearmint toothpaste).
- 2 ½ Cups All-Purpose Flour: Spooned and leveled.
- 1 Teaspoon Salt.
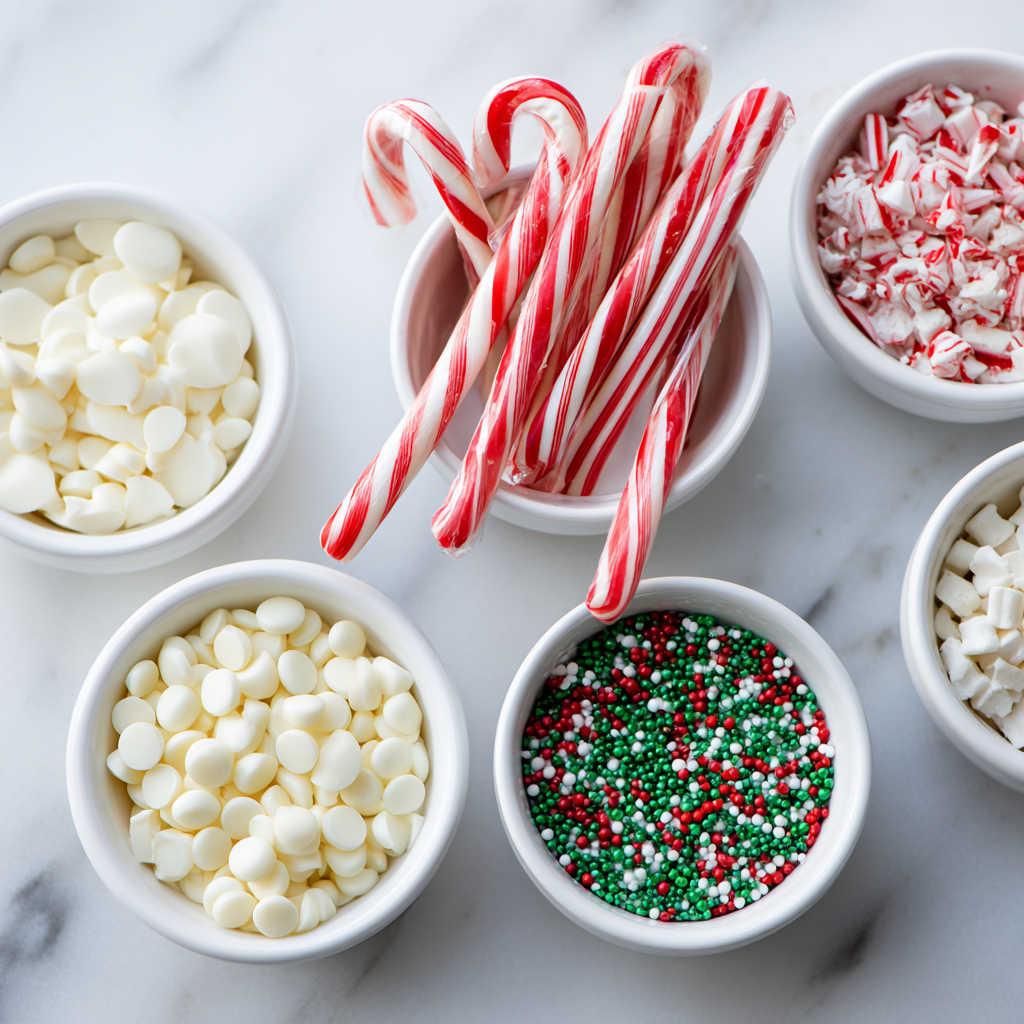
The Color & Crunch:
- Red Gel Food Coloring:
- Why Gel? Liquid food coloring adds water to the dough, making it sticky and hard to roll. Gel provides intense color without altering the hydration.
- ½ Cup Crushed Candy Canes: Mixed with 2 Tablespoons Granulated Sugar (for the topping).
Substitutions:
- Extract: If you dislike peppermint, almond extract works beautifully for a “cherry-almond” vibe (use pink dye instead of red).
- Flour: A 1:1 Gluten-Free flour blend (with Xanthan gum) works well, though the dough will be slightly more fragile to twist.
Timing
This recipe requires patience during the shaping phase.
- Preparation Time: 30 minutes.
- Chilling Time: 2 to 3 hours (Non-negotiable).
- Cooking Time: 8–10 minutes.
- Total Time: Approx. 3 hours 40 minutes.
Data Insight: Dough that is chilled for at least 2 hours relaxes the gluten and solidifies the butter fat.3 This reduces the “spread rate” by approximately 40%, ensuring your candy canes look like canes and not snakes.
Step-by-Step Instructions
Step 1: The Creaming Phase
In a large bowl or stand mixer, beat the softened butter and confectioners’ sugar on medium speed for 2–3 minutes.
- Visual Cue: The mixture should look pale yellow and creamy. Add the egg, vanilla extract, and peppermint extract. Beat until fully incorporated.
Step 2: The Dry Integration
Turn the mixer to low. Gradually add the flour and salt.
- Technique: Mix only until the flour disappears. Do not overmix, or the dough will become elastic and difficult to roll into ropes.
Step 3: The Division and Dye
Divide the dough in half (use a kitchen scale for precision). Leave one half plain (white).
- Coloring: Return the other half to the mixer. Add 1 teaspoon of red gel food coloring. Mix on low until the color is uniform.
- Chill: Wrap each ball of dough separately in plastic wrap. Flatten them into discs. Refrigerate for at least 2 hours (or overnight).
Step 4: The Roll and Twist
Preheat oven to 375°F (190°C). Line baking sheets with parchment paper.
- Work Cold: Take only a small amount of dough out of the fridge at a time.
- Shaping: Pinch off a teaspoon of white dough and roll it into a 4-inch rope on a lightly floured surface. Do the same with the red dough.
- The Twist: Place the two ropes side-by-side.4 Gently twist them around each other. Pinch the ends to seal. Curve the top to form the hook of the candy cane. Place on the baking sheet.
Step 5: The Bake
Bake for 8–10 minutes.
- Crucial Doneness Test: The cookies should feel set, but should not brown. If they turn golden, you have overbaked them, and the white stripes will look yellow.
Step 6: The Sparkle Finish
While the cookies are still hot on the baking sheet, sprinkle them immediately with the mixture of crushed candy canes and granulated sugar.
- The Science: The residual heat melts the sugar slightly, adhering the crunch to the cookie. Let cool on the pan for 5 minutes before moving to a wire rack (they are fragile when hot!).
Nutritional Information
These are a buttery indulgence. Here is the estimated breakdown per cookie (based on 24 cookies):
| Nutrient | Amount | % Daily Value |
| Calories | 140 kcal | – |
| Total Fat | 8g | 12% |
| Saturated Fat | 5g | 25% |
| Carbohydrates | 16g | 6% |
| Sugars | 7g | – |
| Protein | 2g | 4% |
Data Insight: Using confectioners’ sugar instead of granulated sugar reduces the total sugar content per volume slightly, while providing a texture that feels richer on the palate due to the cornstarch.5
Healthier Alternatives for the Recipe
Customize these Candy Cane Cookies for different dietary needs:
- Lower Sugar:
- Use a Monk Fruit Powdered Sweetener for the dough.
- Skip the crushed candy topping.
- Vegan:
- Use high-quality vegan butter sticks (not tub margarine, which has too much water).
- Use a flax egg substitute or 3 tablespoons of aquafaba.
- Natural Dye:
- Use Beet Root Powder instead of red dye No. 40. Note that beet powder has a slight earthy taste, so ensure your peppermint extract is strong enough to mask it.
Serving Suggestions
These cookies are visually striking and deserve to be displayed.
- The Cookie Box: These are the “anchors” of a holiday box. Their shape fills the gaps between round cookies perfectly.
- Tree Ornaments: If you make the hook wide enough, you can actually hang these on a Christmas tree (for a short time!).
- Drink Pairing: Serve with Hot Chocolate or a mocha. The peppermint in the cookie flavors the drink as you sip.
Common Mistakes to Avoid
Twisted cookies require finesse. Avoid these errors:
- Warm Dough:
- The Error: Rolling the whole batch at once.
- The Result: The dough gets oily and breaks when you try to twist it.
- The Fix: Keep the main dough block in the fridge. Work with small pieces.
- Uneven Ropes:
- The Error: Making the red rope thicker than the white.
- The Result: The cookie bakes unevenly and curves weirdly.
- The Fix: Measure your dough balls to be equal size before rolling.
- Flour Overload:
- The Error: Using too much flour on the counter.
- The Result: The ropes lose their “stick” and won’t twist together; they just slide apart.
- The Fix: Use a silicone mat or very minimal flour.
Storing Tips for the Recipe
These cookies have a long shelf life, making them great for gifting.
- Room Temperature: Store in an airtight container for up to 2 weeks. Layer with wax paper to prevent breakage.
- Refrigeration: Not necessary, but can extend freshness.
- Freezing:
- Baked: Freeze for up to 3 months.
- Dough: Freeze the discs of red and white dough separately. Thaw in the fridge overnight before shaping.
Conclusion

Easy Christmas Candy Cane Cookies are a labor of love that pays off in smiles. While they require a bit of hand-rolling technique, the result is a festive, buttery, minty treat that captures the magic of the season better than any store-bought candy. They are tender, nostalgic, and undeniably cute.
Summary: A classic peppermint shortbread cookie dough, divided and colored red and white, then twisted into festive candy cane shapes.6 Requires chilling.
Ready to do the twist?
Clear some fridge space! Rate this recipe 5 stars if you mastered the rope roll, and leave a comment below: do you dip yours in chocolate or keep them classic? Subscribe for more holiday baking guides!
FAQs
Can I dip these in chocolate?
Yes! A popular variation is to dip the bottom “straight” half of the candy cane in melted dark or white chocolate after baking. It adds a delicious extra layer of flavor.
Why did my cookies break when shaping?
The dough was likely too cold or too dry. If it cracks when rolling, cup it in your warm hands for a few seconds to make it pliable again. If it crumbles, you may have measured too much flour (always spoon and level!).
Can I make these without a mixer?
Yes, but you need very soft butter and a lot of elbow grease to cream the butter and powdered sugar until smooth. A mixer ensures the red food coloring is distributed evenly without streaks.
My red dough looks pink. What do I do?
You need to be aggressive with the food coloring. Add more gel! Also, remember that the color will darken slightly as it bakes and dries out.
Leave a Reply