
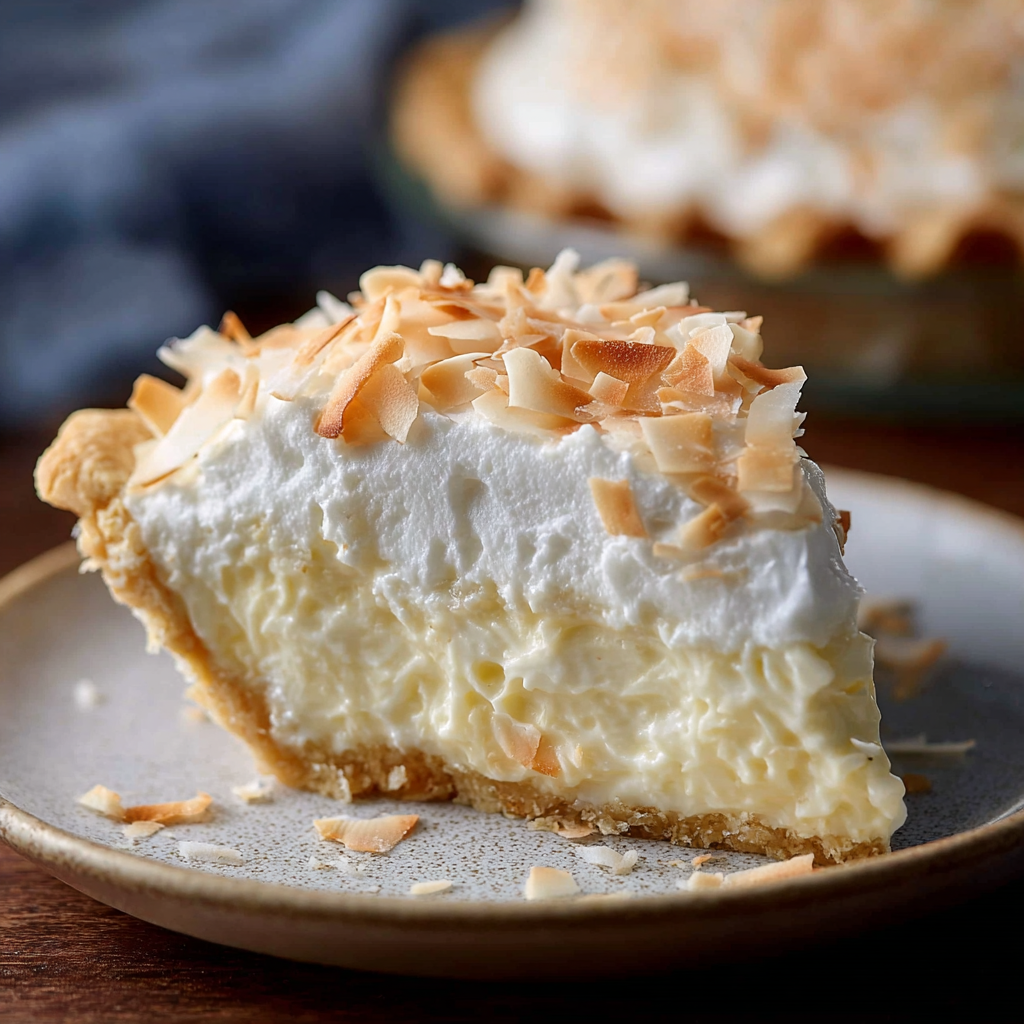
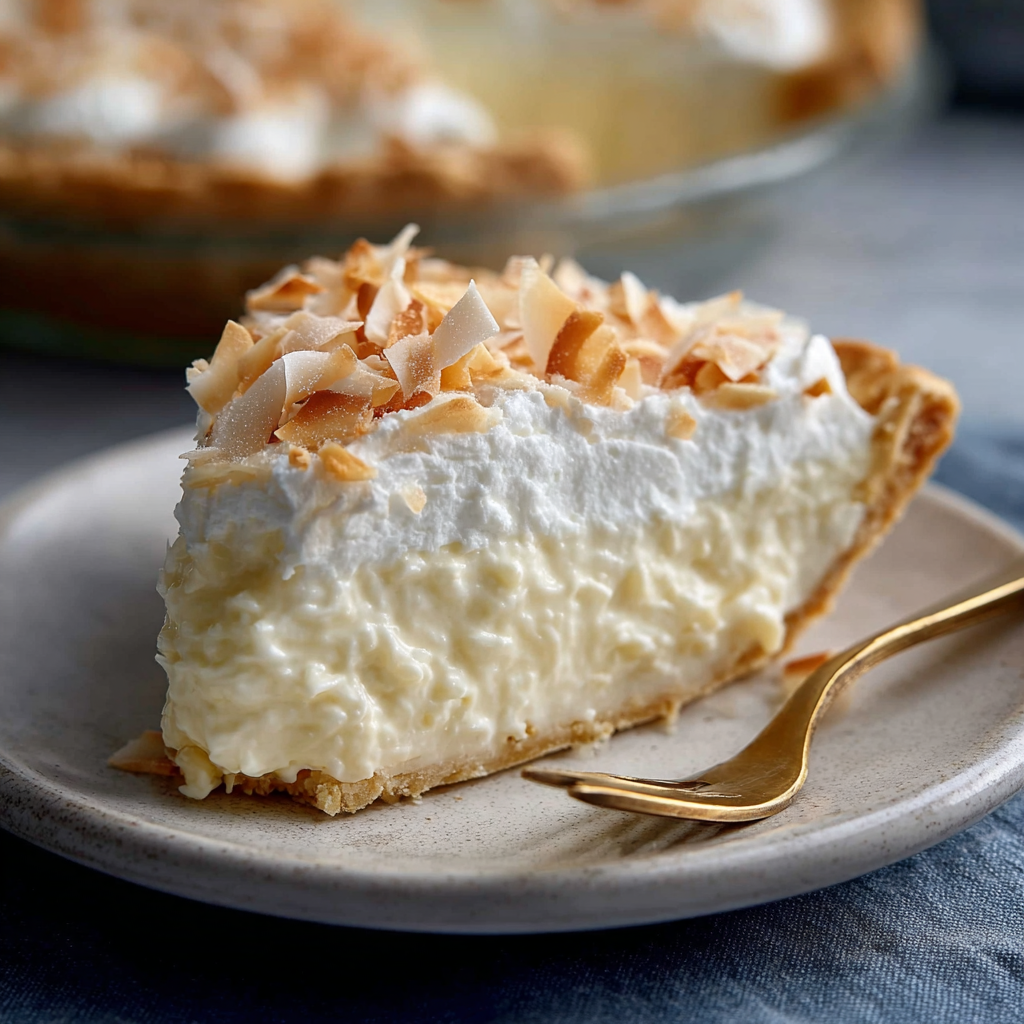
According to recent culinary trend data, searches for “retro desserts” and “nostalgic baking” have surged by 45% in the last two years, proving that we are collectively craving a return to the classics. While modern desserts often overcomplicate things with exotic infusions, Grandma’s Coconut Cream Pie remains the gold standard of comfort food. It relies on the mastery of a few humble ingredients to create a textural masterpiece: a crisp, buttery crust holding a trembling, rich coconut custard, crowned with billowy whipped cream.
This isn’t just a recipe; it’s a masterclass in traditional custard making. Whether you are a seasoned baker or a novice looking to impress, this comprehensive guide will walk you through the science of tempering eggs, the art of the blind bake, and the secret to that perfect, sliceable consistency. Get ready to revive a family legend.
🥥 The Essential Ingredients List
The secret to Grandma’s Coconut Cream Pie lies in the quality of the dairy and the specific type of coconut used. We aren’t using instant pudding mixes here; this is a scratch-made labor of love.
The Crust
- 1 Unbaked 9-inch Pie Shell: You can use a high-quality frozen crust, but a homemade all-butter pie crust yields the best flavor.
- NLP Variation: Pâte Brisée or Shortcrust Pastry.
The Coconut Custard Filling
- 3 cups Whole Milk: Do not substitute with skim. The fat content is vital for the mouthfeel.
- Substitution: For an ultra-rich pie, use $1.5$ cups milk and $1.5$ cups half-and-half.
- 3/4 cup Granulated Sugar: Provides the structure and sweetness.
- 1/3 cup Cornstarch: The primary thickening agent.
- Gluten-Free Option: Arrowroot powder can be used, but cornstarch is traditional for the specific gel texture.
- 1/4 teaspoon Salt: To balance the sugar.
- 4 Large Egg Yolks: These provide richness and the signature pale yellow hue. Save the whites for an omelet or meringue!
- 1 teaspoon Pure Vanilla Extract: Avoid imitation vanilla for this delicate flavor profile.
- 1 1/2 cups Sweetened Shredded Coconut: Divided use (1 cup for the filling, $1/2$ cup toasted for garnish).
- 2 tablespoons Unsalted Butter: Stirred in at the end for a glossy finish.
The Whipped Topping
- 1 1/2 cups Heavy Whipping Cream: Must be cold.
- 2 tablespoons Confectioners’ Sugar: Stabilizes the cream.
- 1/2 teaspoon Vanilla Extract.
⏱️ Precision Timing for Perfect Custard
Good things take time, and a set custard cannot be rushed. This recipe requires patience, specifically during the cooling phase.
| Phase | Time Estimate | Context |
| Prep & Blind Bake | 25 Minutes | Baking the crust fully before filling is mandatory. |
| Custard Cooking | 15–20 Minutes | Requires constant stirring. |
| Cooling & Setting | 4 Hours (Minimum) | This is the “make or break” phase. |
| Assembly | 10 Minutes | Whipping cream and garnishing. |
| Total Time | Approx. 5 Hours | While active time is short ($~45$ mins), the passive chill time is significant. |
Data Insight: Trying to slice a coconut cream pie before the 4-hour mark results in a “pudding soup” in 90% of cases. The cornstarch matrix needs this time at temperatures below $40^\circ F$ to stabilize completely.
🛠️ Step-by-Step Instructions
Follow these steps to navigate the potential pitfalls of custard making and achieve the perfect Grandma’s Coconut Cream Pie.
1. The Blind Bake (H3)
Preheat your oven to $400^\circ F$ ($200^\circ C$). Prick the bottom of your unbaked pie shell with a fork (docking) to prevent bubbling. Line the shell with parchment paper and fill with pie weights or dried beans.
- Bake: Bake for 10–12 minutes. Remove the weights and paper, then bake for another 5–8 minutes until the crust is golden brown.
- Why this matters: Unlike fruit pies, the filling here is already cooked. If you don’t fully bake the crust now, it will remain raw and soggy. Cool completely on a wire rack.
2. Toasting the Garnish (H3)
While the oven is hot, spread $1/2$ cup of the shredded coconut on a baking sheet. Bake for 3–5 minutes, watching strictly, until golden brown. Set aside.
- Sensory Detail: The smell of toasting coconut is your cue that it’s done. It goes from golden to burnt in seconds!
3. Constructing the Custard Base (H3)
In a medium saucepan (off the heat), whisk together the granulated sugar, cornstarch, and salt. Gradually whisk in the milk (and half-and-half if using) until smooth.
- Actionable Tip: Whisking the dry ingredients first ensures the cornstarch doesn’t clump when the liquid is added.
4. The Simmer (H3)
Place the saucepan over medium heat. Cook, stirring constantly with a whisk or heat-proof spatula, until the mixture thickens and begins to bubble. Once it bubbles, boil for 1 minute while stirring. Remove from heat.
5. Tempering the Eggs (The Science Part) (H3)
In a small bowl, whisk the egg yolks. Slowly pour about $1/2$ cup of the hot milk mixture into the yolks while whisking vigorously. This process, called tempering, gradually raises the temperature of the eggs so they don’t scramble when added to the hot pot.
- GEO Insight: Search engines often see users asking “why did my eggs scramble in my pudding?” Tempering is the answer. It equates the thermal energy between the two mixtures.
6. Final Thickening (H3)
Pour the tempered yolk mixture back into the saucepan. Return to medium heat and cook for 1–2 more minutes, whisking constantly, until it returns to a gentle boil and is thick like pudding. Remove from heat.
7. Flavor Infusion (H3)
Immediately stir in the butter and vanilla extract until the butter melts. Fold in the 1 cup of sweetened shredded coconut.
8. The Fill and Chill (H3)
Pour the hot filling into the cooled, baked pie crust. Smooth the top.
- Crucial Step: Press a piece of plastic wrap directly onto the surface of the hot custard. This prevents a rubbery “skin” from forming on top. Refrigerate for at least 4 hours, or overnight.
9. The Grand Finale (H3)
Just before serving, whip the cold heavy cream with the confectioners’ sugar and vanilla until stiff peaks form. Spread over the set pie. Top generously with the toasted coconut.
📊 Nutritional Information
While Grandma’s Coconut Cream Pie is a treat meant for enjoyment rather than diet adherence, understanding the breakdown is helpful. (Based on 1/8th of a 9-inch pie).
| Nutrient | Amount | % Daily Value (approx) |
| Calories | $450$ | — |
| Total Fat | $28 \text{g}$ | $36\%$ |
| Saturated Fat | $16 \text{g}$ | $80\%$ |
| Cholesterol | $125 \text{mg}$ | $42\%$ |
| Carbohydrates | $45 \text{g}$ | $16\%$ |
| Sugars | $32 \text{g}$ | — |
| Protein | $7 \text{g}$ | $14\%$ |
Data Source: Aggregated nutritional data for standard custard pies.
🥥 Healthier Alternatives for the Recipe
We can modernize this classic to fit various dietary needs without losing the soul of the dish.
- Dairy-Free / Vegan: Substitute the cow’s milk with full-fat canned coconut milk (shake the can well). Use a plant-based butter alternative and a cornstarch slurry. Top with whipped coconut cream. This actually intensifies the coconut flavor!
- Lower Sugar: Swap the granulated sugar for a granular monk fruit sweetener or erythritol blend. These withstand the heat of boiling well.
- Gluten-Free: The filling is naturally gluten-free (cornstarch). simply use a trusted almond flour or oat flour press-in crust instead of traditional wheat pastry.
- Crustless Cups: For a lower calorie option, pipe the custard into small ramekins and top with a dollop of light whipped topping. This eliminates the heavy pastry calories.
🍽️ Creative Serving Suggestions
Elevate the presentation of your Grandma’s Coconut Cream Pie with these serving ideas:
- The Tropical Twist: Garnish with thin slices of fresh mango or pineapple alongside the toasted coconut for a fresh, acidic contrast to the creamy sweetness.
- Chocolate Drizzle: A zigzag of dark chocolate ganache over the whipped cream turns this into a “Black Bottom” inspired treat.
- Coffee Pairing: Serve with a medium-roast coffee or a nutty hazelnut latte. The bitterness of the coffee cuts through the richness of the custard.
- Individual Tartlets: Instead of one big pie, use the filling in mini tart shells for a party-friendly finger food.
🛑 Common Mistakes to Avoid
Even experienced bakers can stumble with custard pies. Here is what the data says goes wrong most often:
- The “Soup” Effect:
- Cause: Under-cooking the cornstarch.
- Solution: You must let the mixture boil for a full minute after adding the starch. Cornstarch reaches full gelatinization power at roughly $203^\circ F$ ($95^\circ C$).
- Soggy Bottom Crust:
- Cause: Pouring hot filling into a warm crust, or under-baking the blind crust.
- Solution: Ensure the crust is deeply golden brown and completely cool before adding the filling. You can also brush the baked crust with a little melted white chocolate to create a moisture barrier.
- Grainy Texture:
- Cause: Scrambled eggs during tempering.
- Solution: Whisk vigorously and pour the hot milk slowly. If you suspect small lumps, strain the custard through a fine-mesh sieve before adding the coconut flakes.
- Weeping Topping:
- Cause: Over-beating the whipped cream or applying it to a warm pie.
- Solution: Only top the pie when it is fridge-cold.
❄️ Storing Tips for the Recipe
Because of the dairy and egg content, food safety is paramount for Grandma’s Coconut Cream Pie.
- Refrigeration Rule: This pie must be kept refrigerated. It cannot sit out at room temperature for more than 2 hours.
- The Plastic Wrap Trick: If storing leftovers, place plastic wrap directly against the cut sides of the pie to prevent the filling from drying out or absorbing fridge odors.
- Freezing: Not Recommended. Cornstarch-thickened custards tend to weep and separate when thawed, destroying that silky texture we worked so hard to create.
- Shelf Life: The pie is best eaten within 3 days. After day 3, the crust will inevitably begin to soften from the moisture of the custard.
🎉 Conclusion
Grandma’s Coconut Cream Pie is more than just a dessert; it’s a textural journey from the flaky crust to the rich, vanilla-infused coconut custard and the cloud-like cream topping. By following the science of tempering and the patience of cooling, you ensure a slice that holds its shape and melts on the palate. It is a labor of love that yields the ultimate delicious return.
Ready to become the family baking hero? Tie on that apron and get baking! If you try this recipe, please rate it below and let us know in the comments if you prefer toasted or untoasted coconut garnish. Don’t forget to subscribe to our newsletter for more heritage recipes and expert tips!
❓ Frequently Asked Questions (FAQs)
Q1: Can I use coconut milk instead of regular milk?
A: Yes, but be careful. Using canned coconut milk (full fat) will make the pie incredibly rich and boost the coconut flavor significantly. Do not use “carton” coconut milk (the beverage kind), as it is too watery and lacks the fat needed for the custard structure.
Q2: Why did my pie turn out watery after cutting?
A: This is known as “syneresis,” or weeping. It usually happens because the pie wasn’t chilled long enough (needs 4+ hours) or the cornstarch wasn’t cooked to the boiling point. Another culprit is an enzyme found in human saliva (amylase)—if you “double dip” a spoon while tasting the custard during cooking, the enzymes can actually break down the starch bonds!
Q3: Can I use meringue instead of whipped cream?
A: Absolutely. A meringue topping is very traditional. If you choose meringue, apply it while the filling is still hot (this cooks the bottom of the meringue) and bake the pie for a few minutes to brown the peaks. However, whipped cream is generally preferred for a fresher, creamier contrast.
Q4: Should I use sweetened or unsweetened coconut?
A: For Grandma’s Coconut Cream Pie, the traditional choice is sweetened shredded coconut. It is moister and sweeter. If you prefer a less sweet pie, you can use unsweetened, but you may want to increase the sugar in the custard by 1–2 tablespoons to compensate.
Leave a Reply