Introduction
What if I told you that you could turn a pile of white powder from your pantry into a glowing, rubbery piece of plastic? And what if I told you that this plastic is completely eco-friendly?
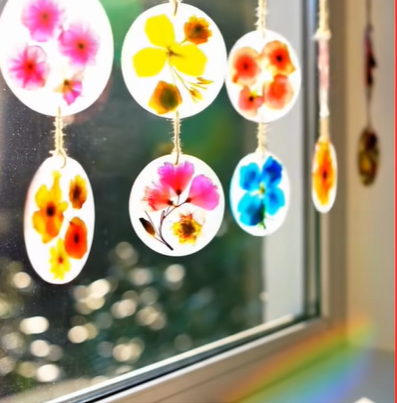
Welcome to the world of Glowing Bioplastic. In this STEM activity, we are going to engineer our own biodegradable polymers using cornstarch. But we are giving it a spooky, magical twist by adding phosphorescent pigment. By day, these suncatchers catch the light in your window; by night, they emit an eerie green or blue glow. It is the perfect intersection of chemistry, sustainability, and Halloween-style fun.
Let’s turn down the lights and turn up the science!
Experiment Snapshot
- Difficulty: Medium (Requires stove use)
- Active Time: 20 Minutes
- Drying Time: 24–48 Hours
- Mess Level: Low to Moderate
- Science Topic: Polymers, Plasticizers & Phosphorescence
Ingredients & Materials
You are essentially making the standard bioplastic recipe, but with a “secret ingredient” for the light show.
The Bioplastic Base
- 1 cup Water: The solvent.
- 1 tbsp White Vinegar: The acid that helps organize the molecular chains.
- 1 tbsp Glycerin: The Plasticizer: This is essential! It prevents the plastic from drying into a brittle cracker. It keeps it rubbery and flexible. (Find it in the pharmacy first aid aisle or cake decorating section).
- 2 tbsp Cornstarch: The polymer base.
The Glow Factor
- 1-2 tsp Glow-in-the-Dark Pigment Powder: You can buy this at craft stores or online.
- Alternative: For a UV-reactive glow (blacklight only), you can replace the water with Tonic Water (contains quinine) or squeeze the ink from a yellow highlighter into the water. However, pigment powder works best for a true “glow.”
Tools
- Saucepan and whisk.
- Silicone mat or aluminum foil.
- Cookie cutters (stars, moons, and planets work best!).
- A straw (to poke a hanging hole).
Step-by-Step Instructions
Step 1: The Cold Whisk
In your saucepan (off the heat), whisk together the water, vinegar, glycerin, and cornstarch.
- Technique: You must dissolve the cornstarch while the water is cold. If the water is hot, the starch will clump instantly.
Step 2: Add the Glow
Stir in your Glow-in-the-Dark powder.
- Tip: The powder doesn’t dissolve; it suspends. Whisk well so you don’t have “glow clumps.”
- Color: If you want the suncatcher to have color during the day, add 1 drop of neon food coloring now.
Step 3: The Polymerization
Place the pan on the stove over medium-high heat.
- Action: Stir constantly!
- Observation: The mixture will start milky and liquid. Within 3-5 minutes, it will suddenly turn into a thick, translucent goo (resembling hair gel or Vaseline).
- Stop Point: Once it is thick and bubbling slowly, remove from heat.
Step 4: Molding
Place your cookie cutters on a silicone mat.
- Pour the hot gel into the cookie cutters.
- Thickness: Aim for about 1/4 inch. If it’s too thick, it takes forever to dry. If it’s too thin, it creates a film that rips.
- Smooth: Use a wet spoon to smooth the tops.
Step 5: The Loop
While the gel is wet, use a plastic straw to punch a hole near the top of each shape. This is for your string later.
Step 6: The Patience Phase (Drying)
Move the mat to a sunny, warm spot.
- Timeline: These need to dry for 2 days.
- Day 1: They will feel rubbery.
- Day 2: They will shrink slightly, become harder, and lift away from the sides of the cookie cutter.
- Unmold: Gently push them out of the cutters. Thread a string through the hole and hang them up!
The Science Behind It
This project teaches two distinct scientific concepts:
1. Polymer Chemistry (The Plastic) Cornstarch is made of long chains of sugar molecules. When we heat them with vinegar, those chains unravel. The Glycerin acts as a “lubricant” at the molecular level. It sits between the starch chains, stopping them from locking together too tightly. This allows the chains to slide past each other, making the final material flexible (plastic) rather than brittle (glass).
2. Phosphorescence (The Glow) Glow-in-the-dark powder contains substances called phosphors (like zinc sulfide or strontium aluminate). These molecules are like light batteries.
- Charging: When sunlight hits the suncatcher, the phosphors absorb the energy and their electrons get “excited” (jump to a higher energy level).
- Glowing: When you turn off the lights, those electrons slowly fall back down to their normal level. As they fall, they release that stored energy as light.
Pro Tips for Success
- Don’t Overheat: If you boil the mixture too long, too much water evaporates, and the plastic will crack as it dries. Remove it from the heat as soon as it looks like gel.
- Charge It Up: For the best glow, hold the suncatcher under a bright LED lamp or UV flashlight for 30 seconds before turning off the lights.
- Water Warning: Bioplastic is biodegradable, which means it isn’t waterproof. If you hang these outside in the rain, they will turn back into slime. Keep them indoors!
- No Powder? If you use the Tonic Water method, your suncatchers won’t glow in the dark on their own, but they will glow bright blue under a Blacklight (UV light) because of the quinine!
Conclusion
Glowing Bioplastic Suncatchers are a brilliant way to visualize how materials science works. You’ve taken organic ingredients and engineered a material that mimics synthetic plastic, all while adding a touch of photoluminescent physics. They look beautiful catching the sun rays by day, and they act as ghostly nightlights after dark.
Ready to glow? Grab that glycerin! If you make these, try experimenting with different cookie cutter shapes and tag us in your spooky creations.
Leave a Reply