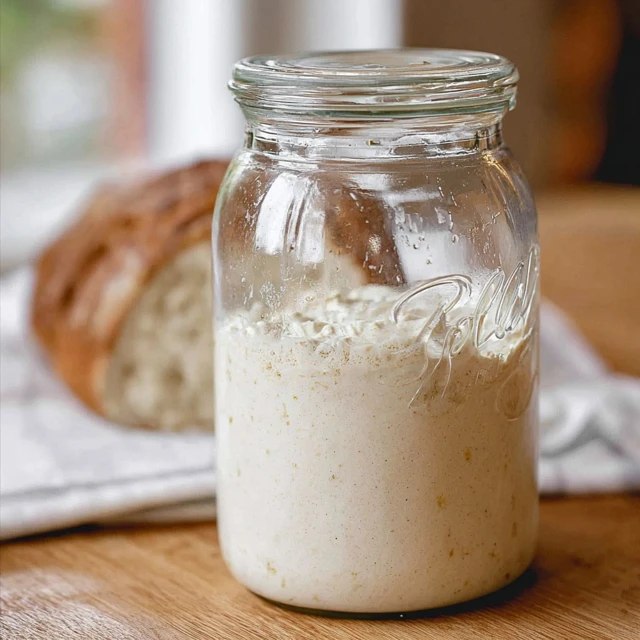
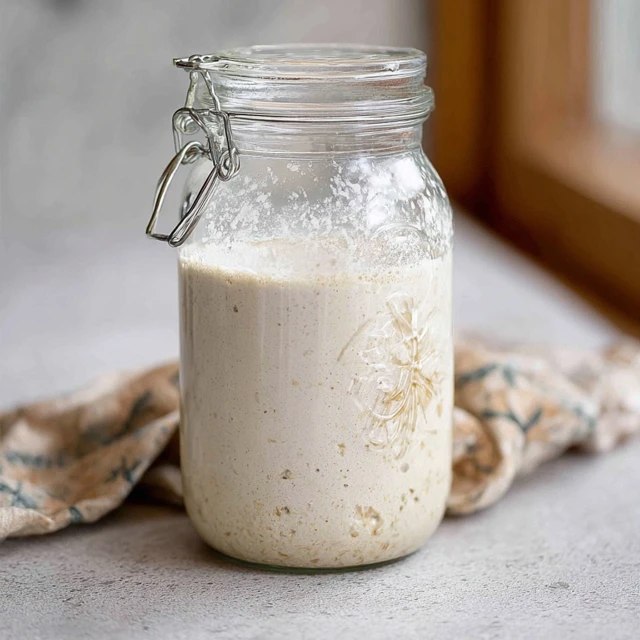
This is the 7-day kitchen experiment I started during a quiet stretch when I wanted to bake real sourdough but didn’t want to buy mail-order starter from a stranger on Instagram. Sourdough starter is the magical jar of bubbling wild yeast that turns flour and water into the foundation of every loaf of real sourdough bread: just two ingredients (flour + water), a 7-day patient build of daily feedings, and you’ll have your own living culture that can last a lifetime.
Fun fact: sourdough starters are alive — literally a colony of wild yeasts (mostly Saccharomyces and Candida) and bacteria (Lactobacillus) that live in symbiosis. The yeast lifts the bread (CO2 production) and the bacteria produce the tangy lactic and acetic acids that give sourdough its signature flavor. The oldest documented starter is from Alaska’s Yukon gold rush era (over 100 years old) — and certain San Francisco bakeries have starters they’ve fed continuously since the 1850s, making them older than the bakery building they live in. Your own starter takes on the flavor of the wild yeast in YOUR kitchen, which is why no two sourdoughs taste identical.
Why this method works
Whole wheat or rye kickstarts wild yeast. The bran in whole wheat or rye flour carries more wild yeast than white flour, so starting with one of them speeds up activation by days.
Discard-and-feed prevents acidity buildup. Without discarding, the starter becomes too acidic and kills off the yeast. Removing half daily keeps the population balanced.
Filtered water (not chlorinated) protects bacteria. Chlorine in tap water kills the very bacteria you’re trying to cultivate. Use filtered or let tap water sit uncovered for 24 hours.
What you need
Makes 1 active starter (about 1 cup mature starter after 7 days).
Ingredients
1 cup (120 g) whole wheat or rye flour (Day 1 only)
About 4 cups (500 g) unbleached all-purpose flour total (for feedings Days 2-7)
Filtered or non-chlorinated water (about 4 cups total)
Equipment
1-quart (4-cup) wide-mouth glass jar (NO metal lid touching the starter)
Wooden or silicone spoon (avoid reactive metals)
Rubber band or marker (to track growth)
Kitchen scale (highly recommended for accuracy)
Clean tea towel or loose-fitting jar lid (must allow airflow)
The 7-day starter schedule
Day 1: Combine flour and water
In the jar, combine 60 g whole wheat or rye flour with 60 g filtered water (1:1 ratio by weight). Stir vigorously to incorporate air. Cover loosely with a tea towel or loose lid. Mark the starter level with a rubber band. Let sit at room temperature (70-75°F ideal) for 24 hours.
Day 2: First feeding
You may see a few bubbles or no activity yet (both are fine). Discard half of the starter (about 60 g). To the remaining starter, add 60 g all-purpose flour + 60 g water. Stir, cover, mark new level. Wait 24 hours.
Day 3: Twice-daily feedings begin
Starter should show some bubbles and rise slightly. Begin feeding TWICE per day (morning and evening, 12 hours apart). Each feeding: discard half, add 60 g flour + 60 g water, stir, cover, mark level.
Days 4-5: Active fermentation
Starter becomes increasingly bubbly. It should rise visibly between feedings and have a tangy, slightly sour smell (like yogurt mixed with apple). Continue feeding twice daily, same ratio. If it doubles within 4-6 hours of feeding, you’re on track.
Days 6-7: Maturity
A mature starter doubles in 4-6 hours, has a smooth domed top with lots of bubbles, smells pleasantly sour, and passes the “float test” (a teaspoon dropped in water floats). Continue twice-daily feedings on Day 6, then on Day 7 your starter is ready to bake bread with.
Day 8+: Maintenance
Once active, you can refrigerate the starter and feed it once a week (discard half + 60 g flour + 60 g water). To bake bread, bring it to room temp and feed twice a day for 24-48 hours before using.
Nutrition information
Calories: ~40 kcal per tbsp of starter (most goes into bread, not eaten directly)
Carbohydrates: 8 g per tbsp
Protein: 1 g per tbsp
Probiotic content: active lactic acid bacteria (killed during baking, but starter “discard” can be eaten raw in some recipes)
Pro tips for a healthy starter
Consistent temperature is key. 70-75°F is ideal. Cold kitchens slow fermentation (rise takes 8-12 hours instead of 4-6). Warm kitchens speed it up.
Don’t seal the jar airtight. CO2 buildup can crack glass. Loose lid or breathable cloth allows gases to escape while keeping out dust.
Use the same flour consistently. Switching brands or types can shock the culture. Once established, stick with what works.
Don’t waste the discard. Sourdough discard makes amazing pancakes, waffles, crackers, pizza dough, and biscuits — countless recipes online for “sourdough discard.”
Frequently asked questions
What does an active starter look like?
Doubled in volume, riddled with bubbles throughout (not just on top), domed surface, tangy pleasant smell. If you drop a small spoonful in water, it floats.
What if my starter smells like nail polish or vinegar?
It’s hungry — too much time between feedings has built up acetic acid. Discard down to 1 tbsp and feed with extra flour (1:2:2 ratio: 1 part starter, 2 parts flour, 2 parts water) for 2-3 feedings to revive.
What if I see colored mold or pink streaks?
Throw it out and start over. Pink, orange, fuzzy gray-green, or black mold means contamination. (A grayish liquid on top called “hooch” is normal — pour it off or stir back in for tang.)
Can I skip a feeding?
Once mature, the starter can survive in the fridge for weeks with weekly feedings. During the initial 7-day build, missing feedings significantly slows progress — try to feed on schedule.
Do I need a kitchen scale?
Yes, strongly recommended. Volume measurements (cups) vary by flour density. Sourdough is a science — 60 g is 60 g every time, but 1/2 cup can vary by 20%.
How do I name my starter?
This is the most important step. Most sourdough bakers name their starters (Doughy Parton, Clint Yeastwood, Bread Pitt). It bonds you to the care routine. Yours can be anything that makes you smile — you’ll be feeding it for years.
Sourdough Starter (Wild Yeast, Flour + Water, From Scratch, 7 Day Build)