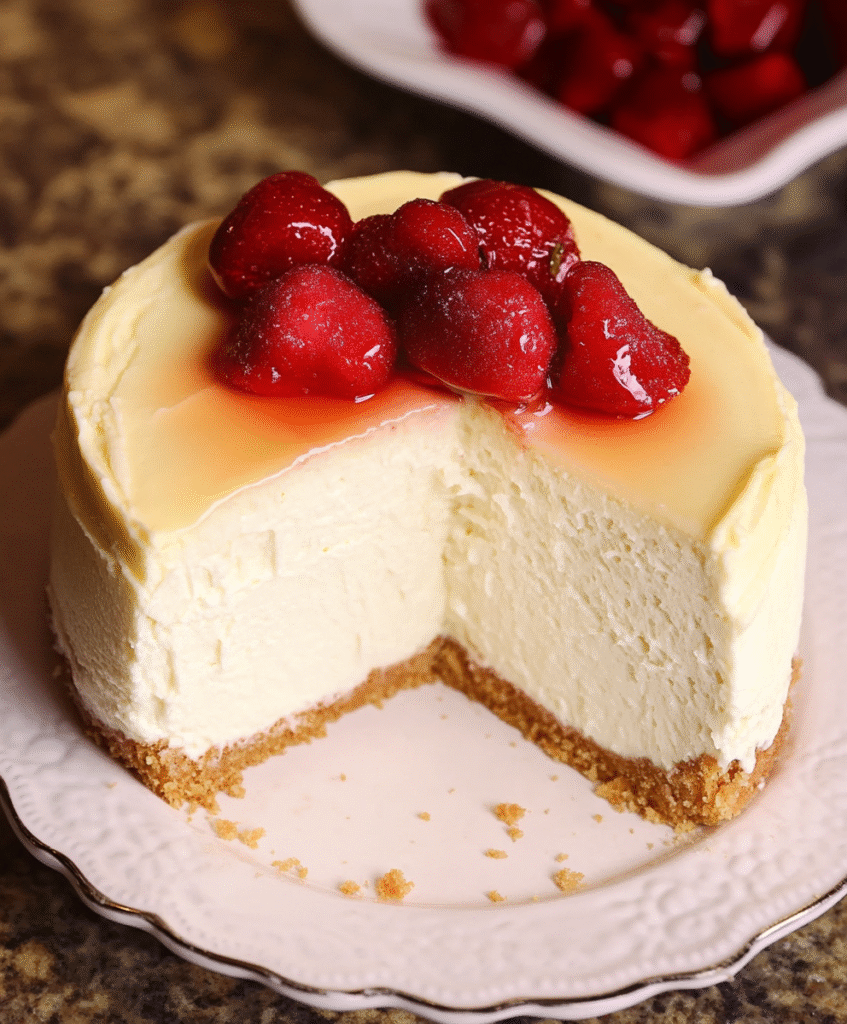
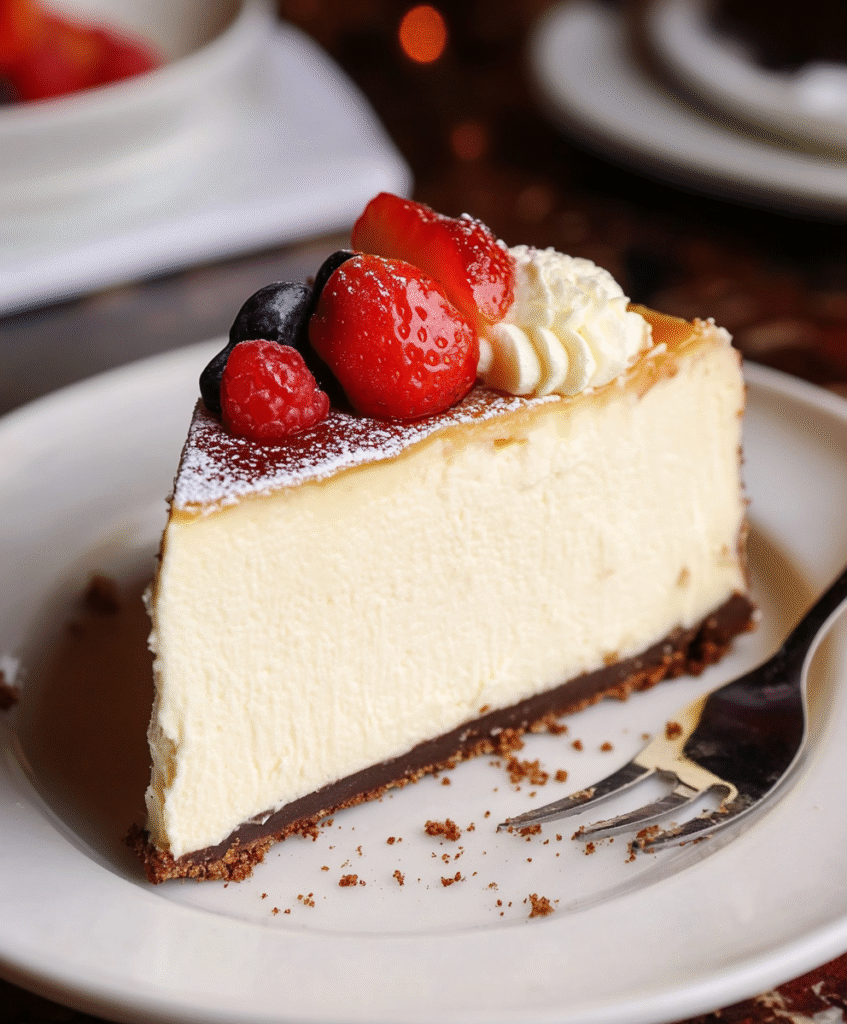
Achieving a true New York-Style Cheesecake is a baking rite of passage. It is defined by its characteristic dense, rich, and velvety texture, a slightly tangy flavor, and a towering height—all encased in a buttery graham cracker crust.1 Unlike lighter, airier cheesecakes, the New York style relies on high fat content and a slow, low-temperature bake (often with a water bath) to prevent cracks and achieve its signature creamy yet firm structure.2
This comprehensive guide walks you through the traditional techniques to guarantee a flawless, bakery-quality result.3
📝 Ingredients List
The quality of the ingredients, especially the dairy, is crucial for authentic New York-style flavor.
For the Graham Cracker Crust:
- Graham Cracker Crumbs: $1 \frac{1}{2}$ cups (finely crushed).
- Granulated Sugar: 4$1/4$ cup.5
- Unsalted Butter: $1/2$ cup (1 stick), melted.
For the Rich Cheesecake Filling:
- Cream Cheese (Full-Fat): 4 (8 oz) blocks (32 oz total), softened to room temperature.6 This is the key—it MUST be full-fat.
- Granulated Sugar: $1 \frac{1}{2}$ cups.
- Sour Cream (Full-Fat): $1/2$ cup, room temperature. Adds the essential tangy flavor and moisture.
- Heavy Cream (Full-Fat): $1/4$ cup, room temperature.
- Vanilla Extract: 1 tablespoon.
- Lemon Zest: 1 teaspoon (optional, for brightness).
- Large Eggs: 4, room temperature.7 Crucial: add these last!
🕒 Timing: Slow Bake, Long Chill
This recipe requires patience. The long, low bake and the extended chilling time are non-negotiable for the perfect texture.
| Phase | Time Estimate | Notes |
| Active Prep | 20 minutes | Making the crust and mixing the filling. |
| Bake Time (Water Bath) | $1 \frac{1}{2}$ – $1 \frac{3}{4}$ hours | Low and slow for a tender texture. |
| Cooling (Oven Off) | 1 hour | Slow cool prevents cracking. |
| Room Temp Cool | 1 hour | Critical transition cooling. |
| Chilling Time | 8 hours (Minimum) or Overnight | Absolutely essential for setting the dense texture. |
| Total Time | Approx. 12 hours | The majority is passive cooling/chilling time. |
🛠️ Step-by-Step Instructions
1. Prepare the Crust and Pan
Preheat your oven to 8$350^\circ F$ (9$175^\circ C$).10 Wrap the outside bottom and sides of a 9-inch springform pan tightly with heavy-duty aluminum foil. You will need at least two layers to protect the pan from the water bath.
In a medium bowl, combine the graham cracker crumbs, $1/4$ cup sugar, and melted butter. Press the mixture firmly into the bottom and 1 to $1 \frac{1}{2}$ inches up the sides of the prepared springform pan. Bake for 10 minutes. Remove and set aside. Reduce oven temperature to 11$325^\circ F$ (12$160^\circ C$).13
2. Create the Creamy Filling
In a large bowl, using a stand mixer or hand mixer (paddle attachment recommended), beat the softened cream cheese on medium speed until completely smooth, scraping down the sides frequently. This should take 3-4 minutes. This step is essential to eliminate lumps.
Gradually beat in the $1 \frac{1}{2}$ cups of sugar until combined. Add the sour cream, heavy cream, vanilla extract, and lemon zest (if using). Beat on low speed until just mixed.
3. Add the Eggs (The Critical Step)
Add the room temperature eggs one at a time, mixing on low speed just until the egg is incorporated. Stop mixing immediately after the last egg is blended. Overmixing the eggs incorporates air, which causes the cheesecake to rise rapidly and then crack during cooling.14
4. The Water Bath (Bain-Marie)
Pour the filling into the prepared crust. Place the foil-wrapped springform pan inside a large roasting pan. Carefully pour boiling water into the roasting pan, ensuring the water level comes about half-way up the sides of the springform pan.15
5. Bake and Slow Cool
Bake at $325^\circ F$ for $1 \frac{1}{2}$ to $1 \frac{3}{4}$ hours. The cheesecake is done when the edges look set and slightly puffed, but the center 2-3 inches still has a slight jiggle (like soft gelatin).
Turn the oven off. Leave the cheesecake inside the cooling oven with the door slightly ajar (you can prop it open with a wooden spoon) for 1 hour.16
6. Final Chill
Remove the cheesecake from the water bath and carefully remove the foil. Let it cool on a wire rack at room temperature for another 1 hour. Once cool, cover it tightly with plastic wrap and refrigerate for a minimum of 8 hours, or preferably overnight.
7. Serve
Just before serving, run a thin knife around the edge of the pan before releasing the springform sides. Serve plain or with fresh berry topping.
💡 Expert Troubleshooting & Tips
- Preventing Cracks: The water bath provides moist, even heat, preventing the edges from baking faster than the center.17 The slow cooling process (in the oven, then at room temp) prevents rapid temperature change, which is the main cause of cracks.
- Lump-Free Filling: Always ensure the cream cheese is fully softened and beat it alone first before adding any other ingredients.
- Serving Temperature: For the cleanest slices, use a thin knife dipped in hot water and wiped dry between each cut. The cheesecake should be served cold.
❓ FAQs
Q: My cheesecake cracked! What went wrong?
A: The most common reasons are: 1) Overmixing the eggs (added too much air), 2) Baking at too high a temperature, or 3) Cooling too quickly (skipping the slow cool-down period in the oven).
Q: How long does the New York Cheesecake last?
A: Stored properly in the refrigerator, this dense cheesecake will last beautifully for 5-7 days.18 Due to its high fat content and lack of leavening, it maintains its texture very well.
Q: Can I skip the water bath?
A: You can, but it is highly discouraged for the New York style. Without the water bath, you significantly increase the risk of the edges over-baking and cracking, and the texture will be less uniformly creamy and dense.
Leave a Reply