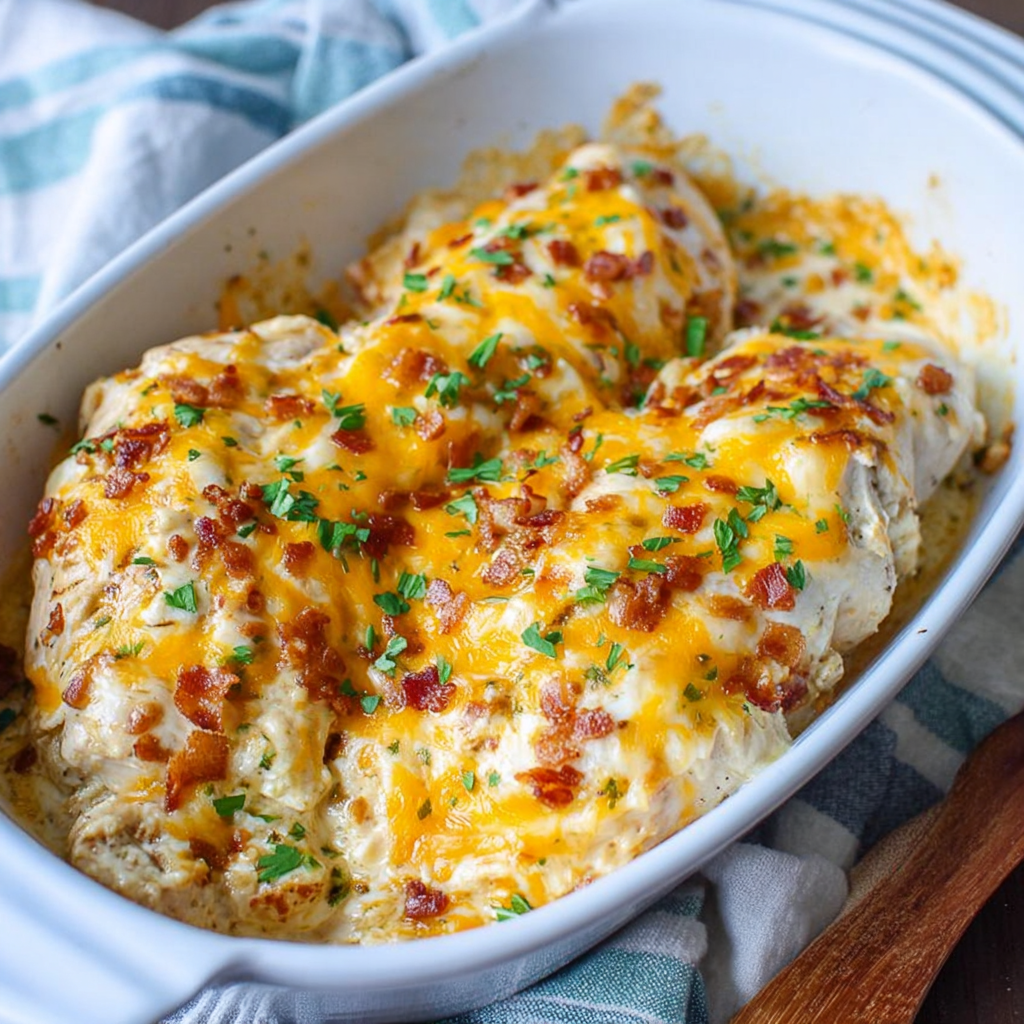
The Gastronomic Architecture: The “Triple-Lipid” Emulsion
In the hierarchy of high-protein casseroles, the Million Dollar Chicken Bake represents a sophisticated study in Moisture Retention and Surface Maillard Browning. The technical challenge of baking chicken breasts is the “Dry-Out Point”: lean white meat begins to expel its intracellular water at 63°C (145°F), often leading to a “stringy” texture. By utilizing a “Million Dollar” topping—a dense emulsion of cream cheese, mayonnaise, and sour cream—you create a Thermal Insulator.
This lipid-heavy barrier prevents evaporative cooling and moisture loss, essentially “poaching” the chicken in its own juices while the top layer undergoes a high-heat caramelization.
Essential Mise en Place: Technical Specs
To achieve a restaurant-grade “velvet” texture and a golden, bubbling crust, the uniformity of the protein and the stabilization of the dairy are the most critical factors.
The Foundation (The Protein)
- Chicken Breasts (700g – 800g): Technical Requirement: Slice the breasts horizontally into “cutlets” or pound them to a uniform 1.5cm thickness. This ensures the edges don’t overcook before the center is safe to consume.
- The “Dry-Rub” Base: Season with garlic powder, onion powder, and smoked paprika before adding the topping to ensure flavor penetrates the muscle fibers.
The “Million Dollar” Matrix
- Cream Cheese (115g / 4 oz): Softened. Acts as the structural base of the topping.
- Mayonnaise (60ml / 1/4 cup): Provides the egg-based emulsifiers for a glossy finish.
- Sour Cream (60ml / 1/4 cup): Introduces lactic acid to “brighten” the heavy fats.
- Crispy Topping: Crushed Ritz crackers or Panko mixed with melted butter for the “Shatter-Crisp” contrast.
The Masterclass: Step-by-Step Culinary Execution
Phase 1: The “Uniformity” Prep
Prepare your chicken by pounding or slicing. Place them in a single layer in a greased baking dish. Technical Requirement: Do not overlap the chicken. Overlapping creates “steam pockets” that prevent the bottom of the chicken from searing and the top from setting properly.
Phase 2: The “High-Viscosity” Blend
In a medium bowl, whisk the cream cheese, mayo, sour cream, and half of your shredded cheese (Mozzarella or Monterey Jack). Expert Tip: If the cream cheese isn’t soft enough, the topping will be “lumpy.” Microwave it for 15 seconds to ensure a perfectly smooth spread.
Phase 3: The “Thermal Shield” Application
Spread the cream cheese mixture evenly over each chicken breast, sealing it to the edges. Sprinkle the remaining cheese and the crushed crackers on top. The crackers act as a Sacrificial Layer, absorbing the direct radiant heat of the oven to protect the dairy underneath.
Phase 4: The Precision Bake
Bake at 190°C (375°F) for 20–25 minutes. Technical Requirement: Use an instant-read thermometer. Pull the chicken when the internal temperature hits 71°C (160°F). Carry-over cooking will bring it to the FDA-recommended 74°C (165°F) while keeping the meat succulent.
Common Technical Pitfalls to Avoid
- The “Soggy Cracker” Syndrome: If you add the cracker topping too early or use too much liquid in the pan, the steam will turn the crunch into mush. Ensure the crackers are well-coated in butter to provide a hydrophobic barrier.
- Oily Separation: If the bake sits too long in the oven, the mayonnaise can “break,” leaving a pool of oil. Stick to the 20-25 minute window.
- Bland Interior: Because the topping is so rich, the chicken underneath needs aggressive seasoning. Don’t be afraid to use a heavy hand with salt and pepper on the raw meat.
Frequently Asked Questions (Q&A)
| Question | Expert Answer |
|---|---|
| Can I use chicken thighs? | Yes, but increase the bake time by 5-10 minutes. Thighs have more connective tissue and benefit from the slightly longer cook. |
| Why is it called “Million Dollar”? | It’s a reference to the richness of the ingredients—specifically the combination of three different dairy fats. |
| What’s the best side dish? | Something high-acid or fibrous to balance the richness, like Steamed Broccoli or a Lemon-Vinaigrette Arugula Salad. |
Leave a Reply