Introduction
Did you know that “Red Velvet” wasn’t originally named for its color, but for its texture? In the Victorian era, “velvet” cakes were those with a soft, fine crumb, distinct from the coarser sponge cakes of the day. Today, however, we eat with our eyes first, and few desserts command attention quite like the vibrant crimson of a Red Velvet Cookie.
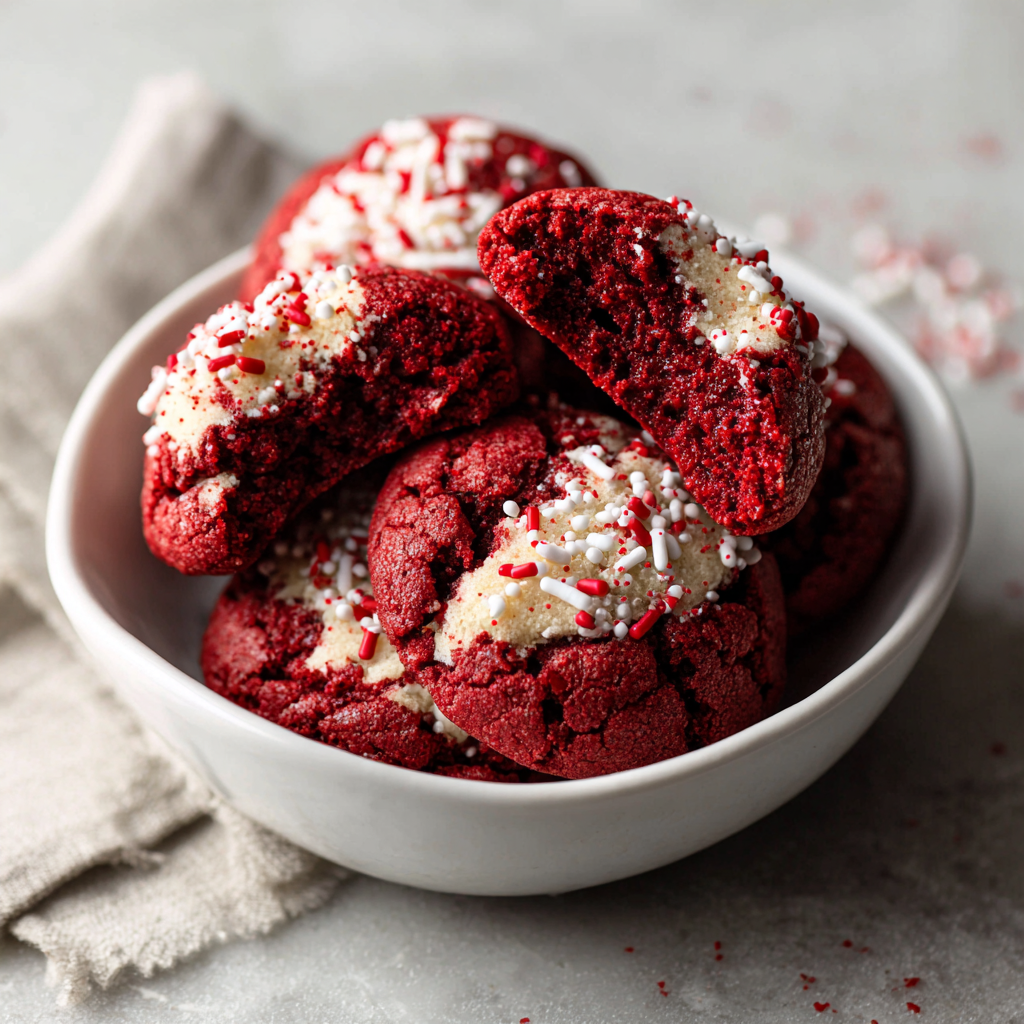
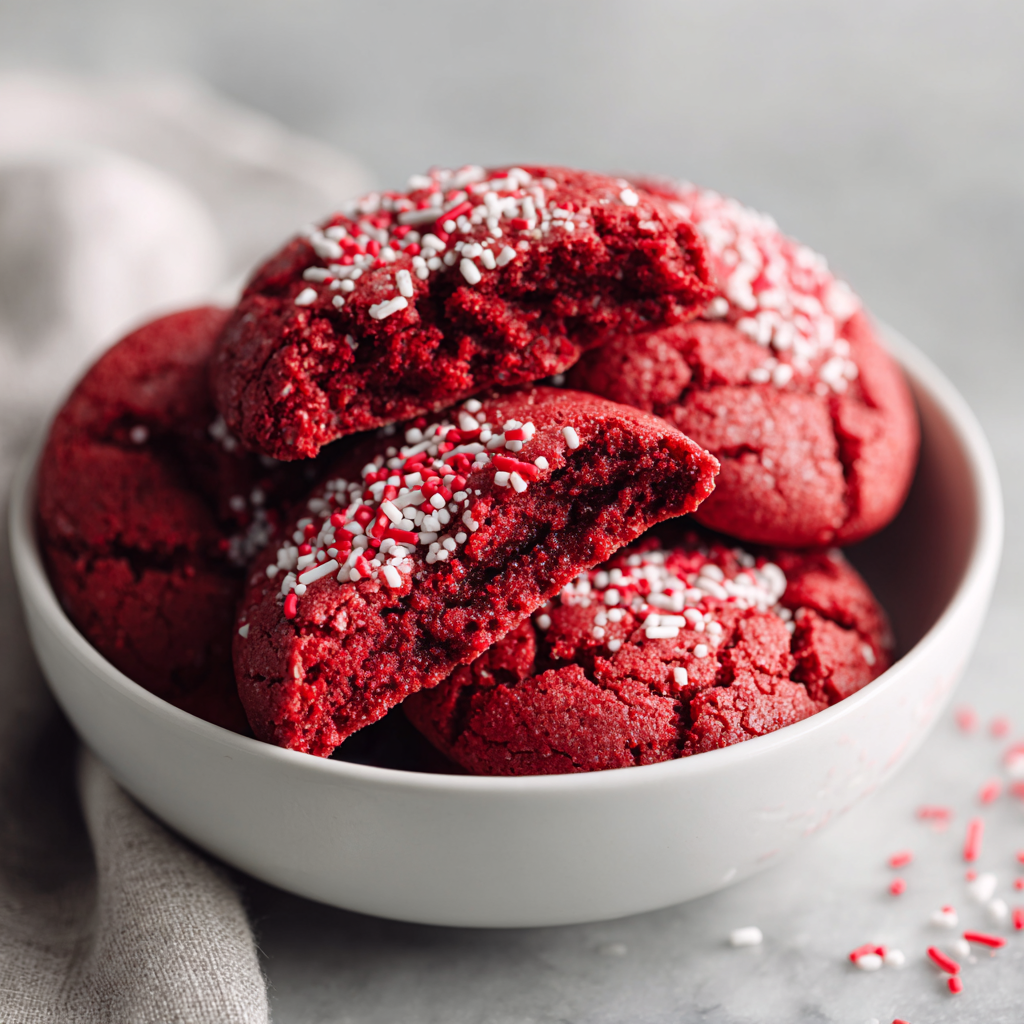
This recipe captures the essence of the famous cake—mild cocoa, buttery vanilla, and a subtle tang—and condenses it into a chewy, fudgy cookie studded with sweet white chocolate chips. Unlike many recipes that simply dye a sugar cookie red, this version respects the chemistry of the original dessert. We use a touch of acidity (to mimic the buttermilk tang) and the right ratio of cocoa powder to ensure a deep maroon hue rather than a bright, artificial neon red. Whether you are baking for Valentine’s Day, Christmas, or just a Tuesday craving, these cookies are the perfect balance of sophistication and comfort.
Ingredients List
To achieve that signature “velvet” texture and distinct flavor profile, specific ingredients are non-negotiable.
The Dry Mix
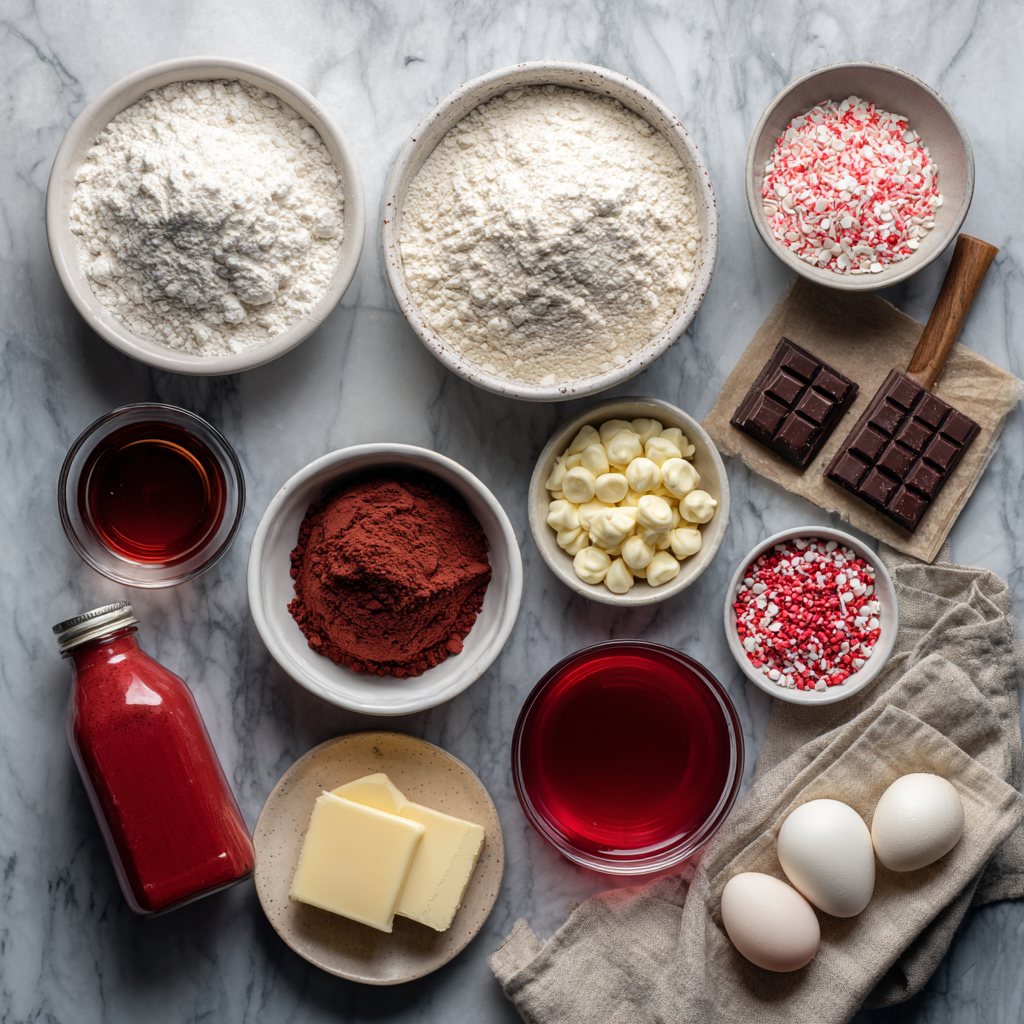
- 1 ½ cups All-Purpose Flour: Spooned and leveled. Too much flour kills the chewiness.
- ¼ cup Unsweetened Cocoa Powder: Crucial: Do not use Dutch-process. Natural cocoa powder is lighter and allows the red color to show through better.
- 1 tsp Cornstarch: The secret to soft, thick cookies that don’t spread too thin.
- ¾ tsp Baking Soda: Reacts with the acidity to create lift.
- ¼ tsp Salt: Balances the sweetness.
The Wet Mix
- ½ cup Unsalted Butter: Softened to cool room temperature.
- ½ cup Brown Sugar (packed): Adds moisture and chew.
- ½ cup Granulated Sugar: For crispy edges.
- 1 Large Egg: Room temperature.
- 1 tbsp Milk (or Buttermilk): Adds necessary hydration.
- 1 tsp Vanilla Extract: Enhances the chocolate notes.
- 1 tsp Red Gel Food Coloring: Pro Tip: Use “Super Red” or “Red Velvet” gel paste. Liquid dye is too watery and will throw off the dough consistency.
- 1 tsp White Vinegar or Lemon Juice: This small amount of acid activates the baking soda and provides that subtle “tang” associated with red velvet cake.
The Mix-Ins
- 1 cup White Chocolate Chips: The creamy sweetness of white chocolate pairs perfectly with the mild cocoa dough.
Sensory Note: The dough should look like a rich, dark burgundy. The aroma will be dominated by vanilla and butter, with a faint earthy note from the cocoa.
Timing
These cookies are relatively quick, but a short chill time is recommended for the best texture.
- Preparation Time: 15 minutes
- Chilling Time: 30 minutes (Optional but recommended)
- Cooking Time: 10-12 minutes
- Total Time: ~1 hour
Data Insight: Including cornstarch in cookie dough increases the moisture retention of the final product by roughly 20%, ensuring the cookies stay soft for days rather than turning into hard biscuits.
Step-by-Step Instructions
Step 1: Whisk the Dry Ingredients
In a medium bowl, sift together the flour, cocoa powder, cornstarch, baking soda, and salt.
- Why Sift? Cocoa powder loves to clump. Sifting ensures you don’t bite into a pocket of bitter powder later.
Step 2: Cream the Butter and Sugars
In a large bowl or stand mixer, beat the softened butter, brown sugar, and granulated sugar on medium-high speed for 2-3 minutes until light and fluffy. This aeration is key for structure.
Step 3: Add Liquids and Color
Add the egg, milk, vanilla, vinegar, and food coloring. Beat until combined and the color is uniform.
- Color Check: If the red isn’t vibrant enough for your liking, add a drop more gel now. Remember, the color will darken slightly as it bakes.
Step 4: Combine
Turn the mixer to low. Gradually add the dry ingredients to the wet ingredients. Mix just until the flour streaks disappear. Do not overmix.
Step 5: The Fold
Fold in the white chocolate chips by hand using a rubber spatula.
- Optional Chill: Cover the bowl and refrigerate for 30 minutes. This solidifies the butter and results in a thicker, fudgier cookie. If you like thinner, crisper cookies, skip this step.
Step 6: Scoop and Bake
Preheat oven to 350°F (175°C). Line baking sheets with parchment paper.
- Scoop about 1.5 tablespoons of dough per cookie. Roll into balls and place 2 inches apart on the sheet.
- Aesthetic Tip: Press a few extra white chocolate chips into the top of each dough ball before baking for a “bakery style” look.
Step 7: Bake
Bake for 10 to 11 minutes.
- Doneness Test: The edges should be set, but the center will look slightly underbaked and soft. Do not bake until hard! They firm up as they cool.
Step 8: Cool
Let them cool on the baking sheet for 5 minutes (they are fragile when hot). Transfer to a wire rack to cool completely.
Nutritional Information
These are a sweet indulgence. Below is the estimated breakdown per cookie (yields approx. 18 cookies).
| Nutrient | Amount per Serving | % Daily Value* |
| Calories | 160 kcal | 8% |
| Total Fat | 8g | 12% |
| Saturated Fat | 5g | 25% |
| Carbohydrates | 22g | 8% |
| Sugars | 16g | – |
| Protein | 2g | 4% |
| Cholesterol | 20mg | 7% |
Note: White chocolate is higher in sugar than dark chocolate, contributing to the higher carb count. These are best enjoyed as an occasional treat.
Healthier Alternatives for the Recipe
To adapt these Red Velvet Cookies for specific dietary needs:
- Natural Coloring: If you want to avoid artificial dyes, use Beet Powder. Note that beet powder has an earthy flavor, so you may need to increase the vanilla slightly to mask it. The color will be a more muted, rustic red.
- Gluten-Free: Use a high-quality 1:1 Gluten-Free Baking Flour blend (like King Arthur or Bob’s Red Mill). The texture is nearly identical.
- Lower Sugar: Reduce the white sugar to ¼ cup and use sugar-free white chocolate chips (like Lily’s brand).
- Dairy-Free: Use a vegan butter stick and dairy-free white chocolate chips. Replace the 1 tbsp milk with almond milk.
Serving Suggestions
These cookies are visually stunning and deserve a good presentation.
- The Sandwich: Pipe cream cheese frosting between two cookies to make Red Velvet Whoopie Pies or Cookie Sandwiches.
- Ice Cream Sundae: Crumble a warm cookie over vanilla ice cream and drizzle with chocolate sauce.
- Valentine’s Gift: Place them in clear cellophane bags tied with white and red ribbon. The contrast makes for beautiful edible gifting.
- Dip It: Serve with a cold glass of milk. The cocoa flavor intensifies when paired with dairy.
Common Mistakes to Avoid
Red velvet is chemistry-sensitive. Watch out for these pitfalls:
- Too Much Cocoa:
- The Issue: Adding too much cocoa powder overpowers the red dye, turning the cookies brown or muddy purple.
- The Fix: Stick to ¼ cup. It’s meant to be a mild chocolate flavor.
- Using Liquid Food Coloring:
- The Issue: You have to use the whole bottle to get a good red, which adds too much liquid to the dough.
- The Fix: Gel paste is concentrated. One teaspoon equals almost a whole bottle of liquid dye in terms of pigment.
- Skipping the Vinegar:
- The Issue: The cookies taste flat and just like vanilla sugar cookies.
- The Fix: The vinegar provides the subtle “tang” that tricks your brain into tasting “Red Velvet.”
- Overbaking:
- The Issue: Waiting for them to look dry.
- The Fix: Pull them when they still look glossy in the middle.
Storing Tips for the Recipe
- Room Temperature: Store in an airtight container for up to 5 days. Add a slice of white bread to the container to keep them soft.
- Freezing Dough: Roll the dough into balls and freeze them on a tray. Transfer to a ziplock bag. Bake from frozen (add 2 minutes to cook time).
- Freezing Baked Cookies: Freeze cooled cookies in a single layer, then stack with parchment paper between them. Good for 3 months. Thaw on the counter.
Conclusion
Red Velvet Cookies are the ultimate showstopper dessert. They offer the best of both worlds: the fudgy chew of a brownie and the handheld convenience of a cookie. By understanding the balance of cocoa, acid, and dye, you can create a treat that is as delicious as it is beautiful. Whether you are baking for love or for yourself, these crimson gems are sure to disappear from the cookie jar in record time.
Ready to paint the town red? Grab your mixer! If you try this recipe, please leave a star rating below and let us know: did you go with white chocolate chips or classic semi-sweet? Don’t forget to subscribe to our newsletter for more colorful baking inspiration.
FAQs
Q: Can I use semi-sweet chocolate chips instead?
A: Absolutely. While white chocolate is traditional for the color contrast and creamy sweetness, semi-sweet or dark chocolate chips make for a richer, more “double chocolate” experience.
Q: Why did my cookies turn brown?
A: This usually happens if you use a high-fat Dutch-process cocoa powder (which is alkaline) or if the oven temperature was too high, causing the sugar to caramelize too dark. Stick to natural cocoa and 350°F.
Q: Can I use beet juice for color?
A: Beet juice adds too much liquid. If you want natural color, stick to concentrated beet powder, but be prepared for a flavor shift.
Q: Can I make these without a mixer?
A: Yes! Just ensure your butter is very soft so you can cream it with the sugar effectively using a wooden spoon and some elbow grease.
Leave a Reply