The Gastronomic Architecture of “Flourless” Leavening
In the hierarchy of high-performance breakfasts, Banana and Oat Pancakes represent a sophisticated study in natural humectants and fiber-matrix stability. The technical challenge lies in the absence of gluten; without wheat flour, the structure relies entirely on the coagulation of egg proteins and the hydration of oat starch.
Data from nutritional science suggests that “blitzing” the oats into a fine powder creates a “pseudo-flour” that maximizes surface area, allowing the pancake to rise via steam and leavening agents rather than gluten-trapped CO₂. The banana acts as a biological emulsifier, providing both moisture and a natural fructose-driven caramelization during the searing phase.
The Essential Mise en Place: Technical Specs
To achieve a light, “fluffy” crumb without traditional flour, the ripeness of the fruit and the hydration time are the most critical factors.
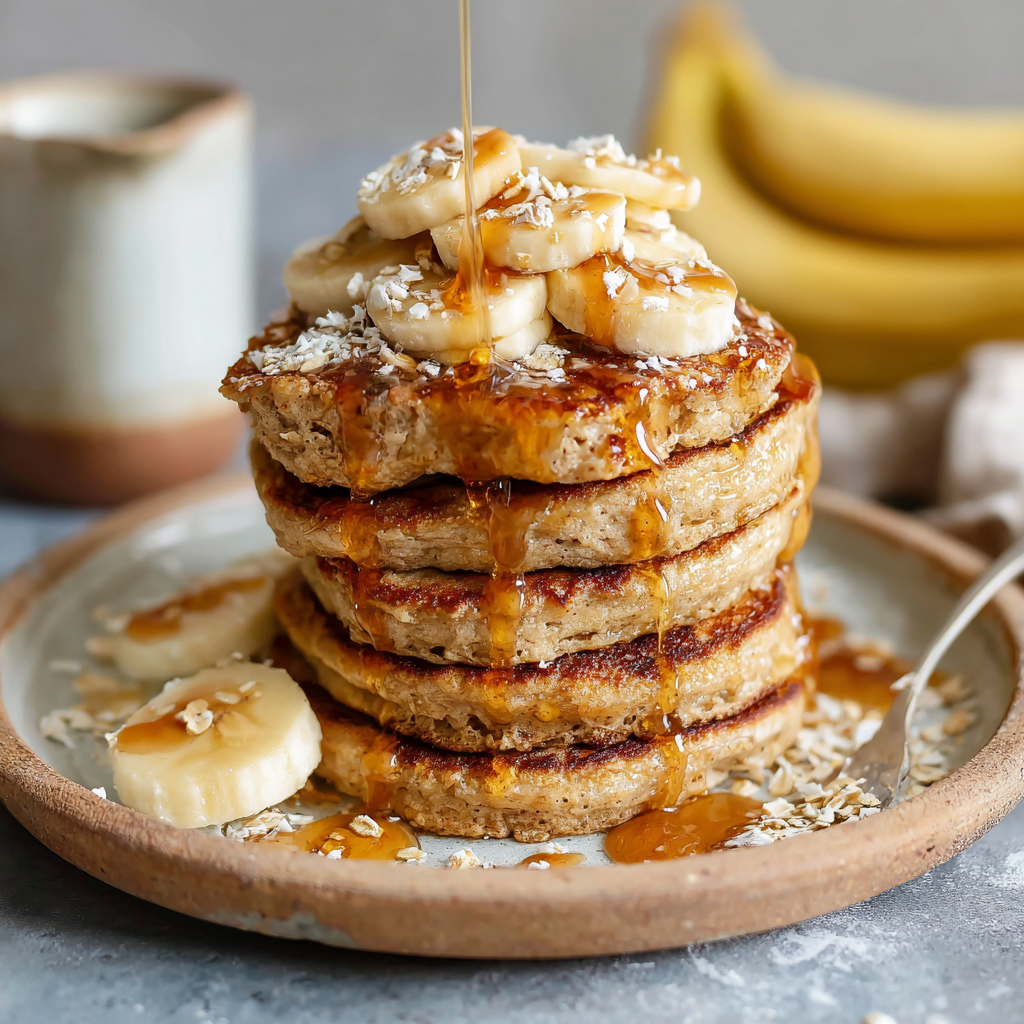
The Structural Base
- Rolled Oats (90g / 1 cup): Technical Requirement: Pulse in a blender until they reach a “flour-like” consistency. This ensures a smooth, non-gritty palate.
- Overripe Bananas (2 medium): Look for “leopard-spotted” skins. These have a higher concentration of simple sugars and softer pectins, making them easier to incorporate into the egg matrix.
- Large Eggs (2): Provide the primary structural “scaffolding” through protein coagulation.
The Leavening & Aromatics
- Baking Powder (1 tsp): Essential for a vertical lift in the absence of gluten.
- Cinnamon & Vanilla Extract: To provide warm top notes that mask the earthy scent of raw oats.
- Pinch of Sea Salt: To “up-regulate” the perceived sweetness of the bananas.
The Masterclass: Step-by-Step Culinary Execution
Phase 1: The “Aqueous” Blending
Combine the oats, bananas, eggs, and baking powder in a high-speed blender. Blitz for 45–60 seconds until the batter is perfectly homogenous.
Phase 2: The Starch Hydration (Crucial Step)
Technical Requirement: Let the batter rest for 5–10 minutes. This allows the oat fibers to fully hydrate (soak up the moisture from the eggs and banana). A rested batter results in a thicker, sturdier pancake that won’t fall apart in the pan.
Phase 3: The Thermal Searing
Heat a non-stick skillet over medium-low heat. Use a small amount of coconut oil or butter. Pour approximately 3 tbsp of batter per pancake. Expert Tip: These pancakes cook faster than traditional ones due to the sugar content in the bananas. Flip as soon as bubbles form and the edges look “set.”
Phase 4: The Maillard Finish
Cook for 60–90 seconds on the second side until golden brown. The natural sugars in the banana will create a beautiful, dark caramelization that provides a “crust” to the soft interior.
Common Technical Pitfalls to Avoid
- The “Gummy” Center: Usually caused by under-ripe bananas or insufficient rest time. Ensure your bananas are soft and mashable.
- Burning: Banana batter is highly sensitive to high heat. If the outside is dark but the inside is wet, lower your heat and cook for longer.
- Sticking: Even with a non-stick pan, the sugars in this recipe can be “tacky.” A light wipe of oil between batches is recommended.

Frequently Asked Questions (Q&A)
| Question | Expert Answer |
| Can I make them vegan? | Replace the eggs with two “flax eggs” (2 tbsp flax meal + 6 tbsp water), but note the rise will be more modest. |
| Can I add blueberries? | Yes, but add them after pouring the batter into the pan to prevent them from breaking in the blender. |
| How to store them? | They freeze exceptionally well. Toast them directly from the freezer for a “snap” finish. |
Leave a Reply